This schedule view is helpful if you already know the class or teacher you want, or if you would like to register for more than one date of the same class.
You will first choose a category, then select your class, then choose the date or dates you would like to attend.
Step 1: Go to the Yoga Class Schedule page
From the Yoga Among Friends website, click Schedule in the top menu.
You will arrive on the Yoga Class Schedule page.
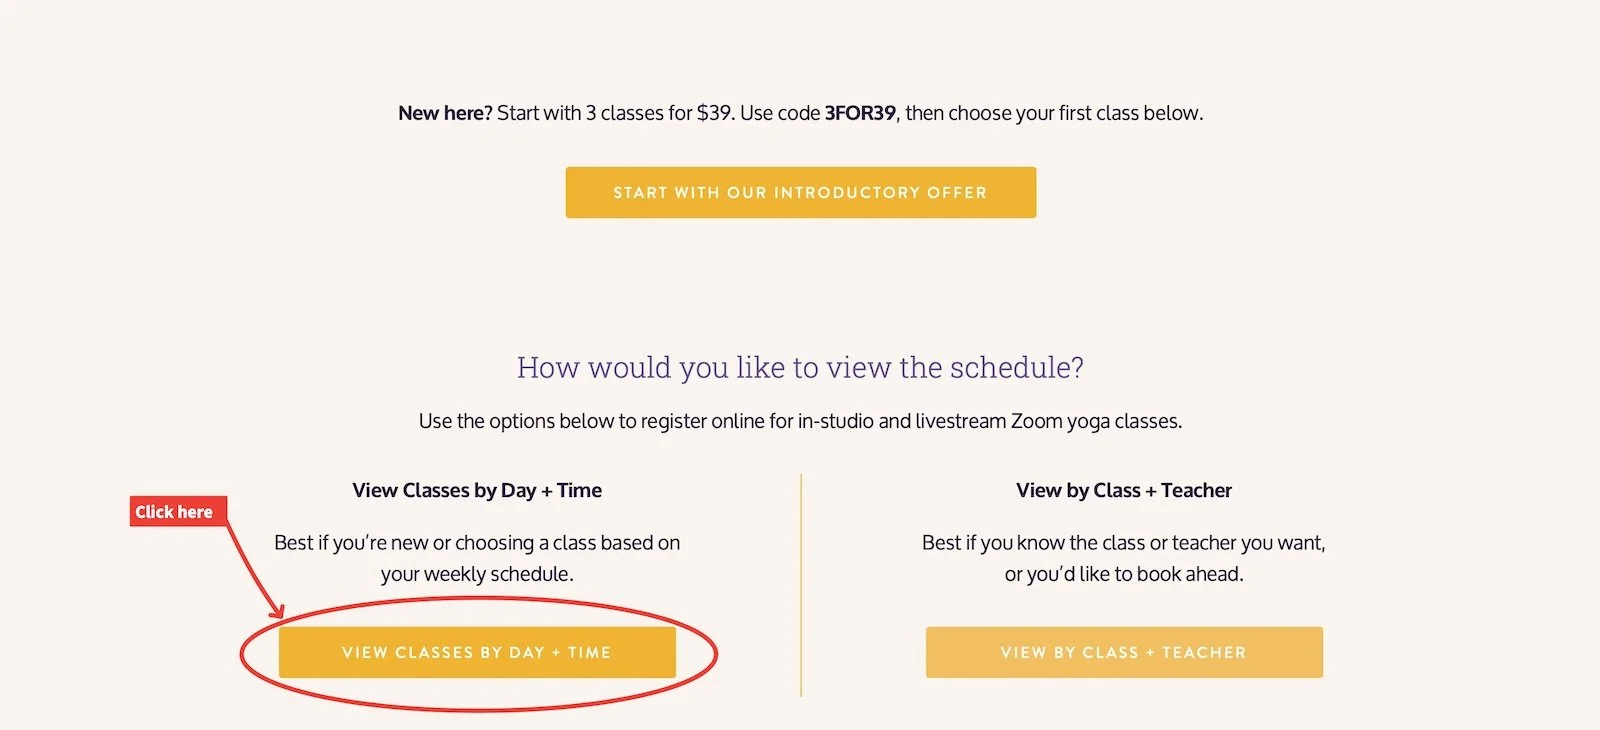
Step 2: Choose how you would like to view the schedule
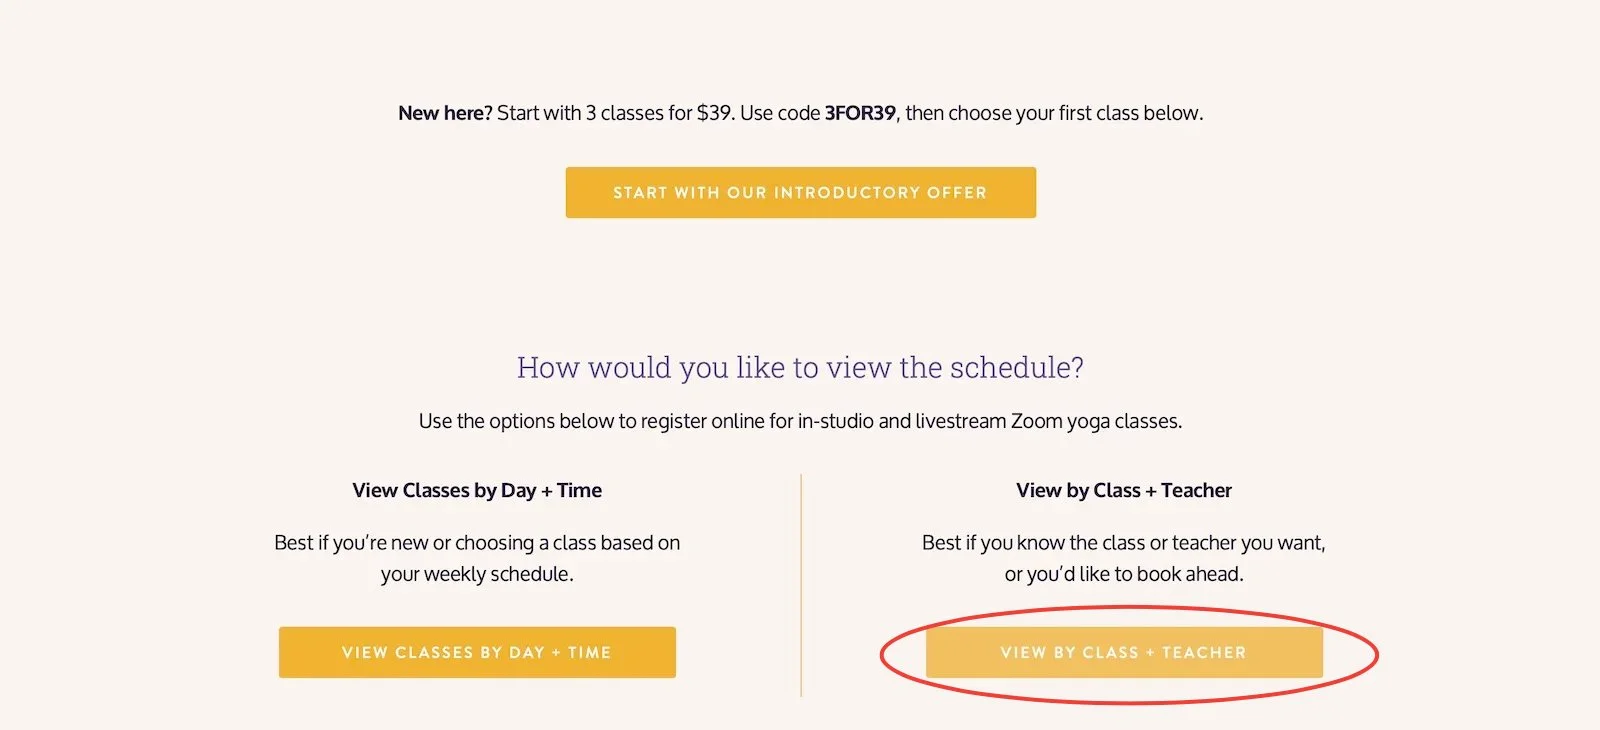
On the schedule page, you will see two options:
View Classes by Day + Time
Best if you are choosing a class based on your weekly schedule.
View by Class + Teacher
Best if you know the class or teacher you want, or you would like to book ahead.
To choose a class by name or teacher, click:
View by Class + Teacher
Step 3: Select a category
Next, you will see a list of categories.
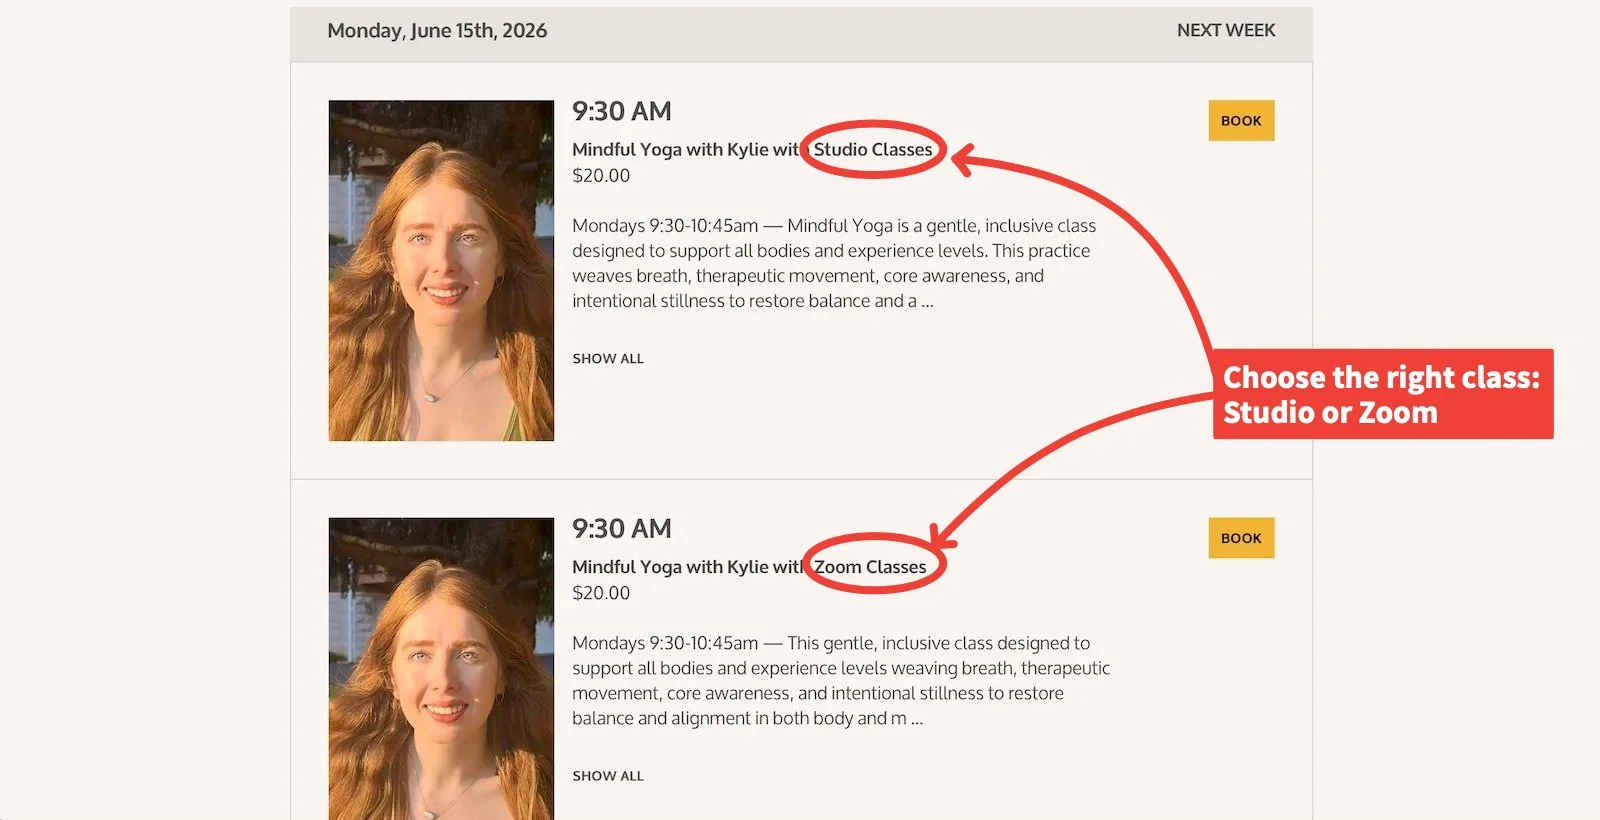
Choose the category that matches how you would like to attend:
In Studio Classes
Choose this if you want to come to the studio in person.
Livestream Classes
Choose this if you want to attend online through Zoom.
Workshops, Series & Special Events
Choose this if you are registering for a workshop, series, or special event.
Click the yellow Select button next to the category you want.

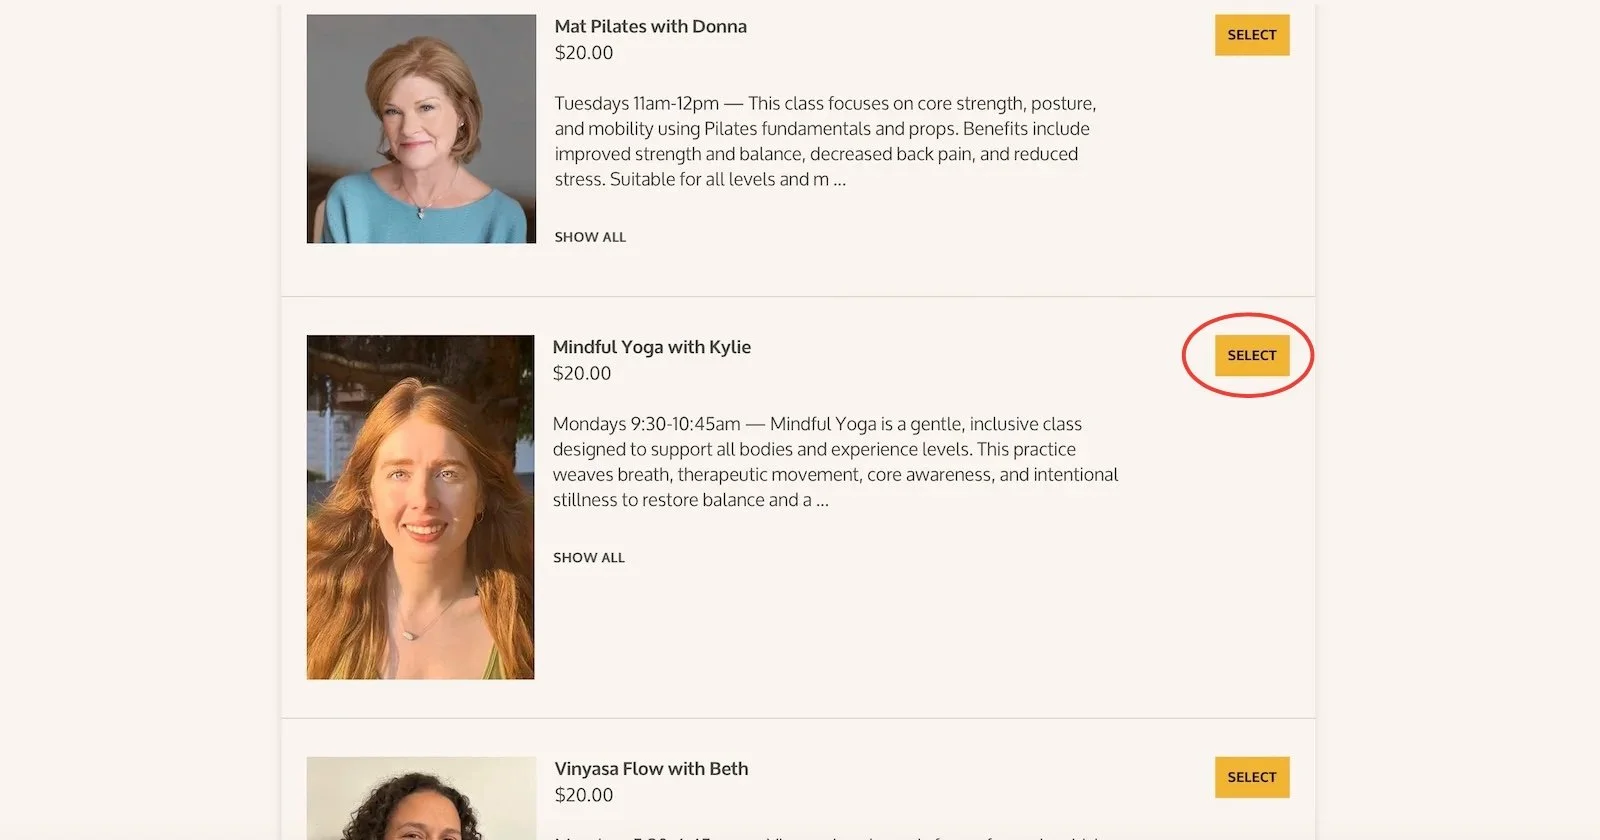
Step 4: Choose your class
After you select a category, you will see a list of classes.
Scroll through the list until you find the class or teacher you want.
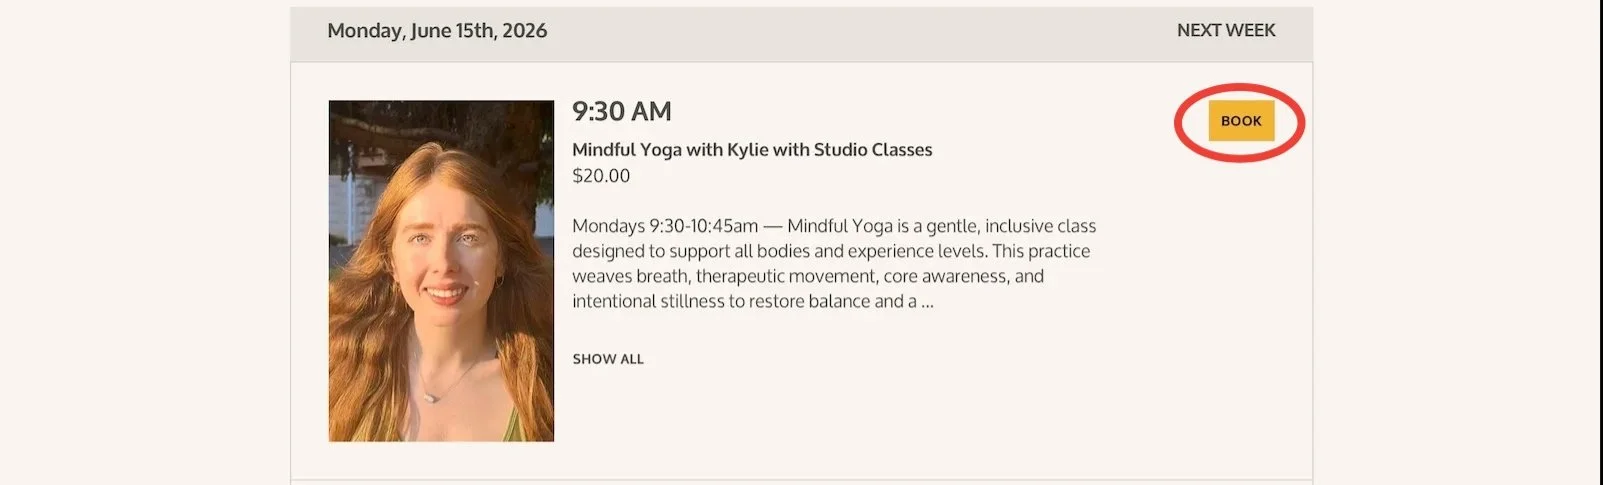
When you find the class, click the yellow Select button.
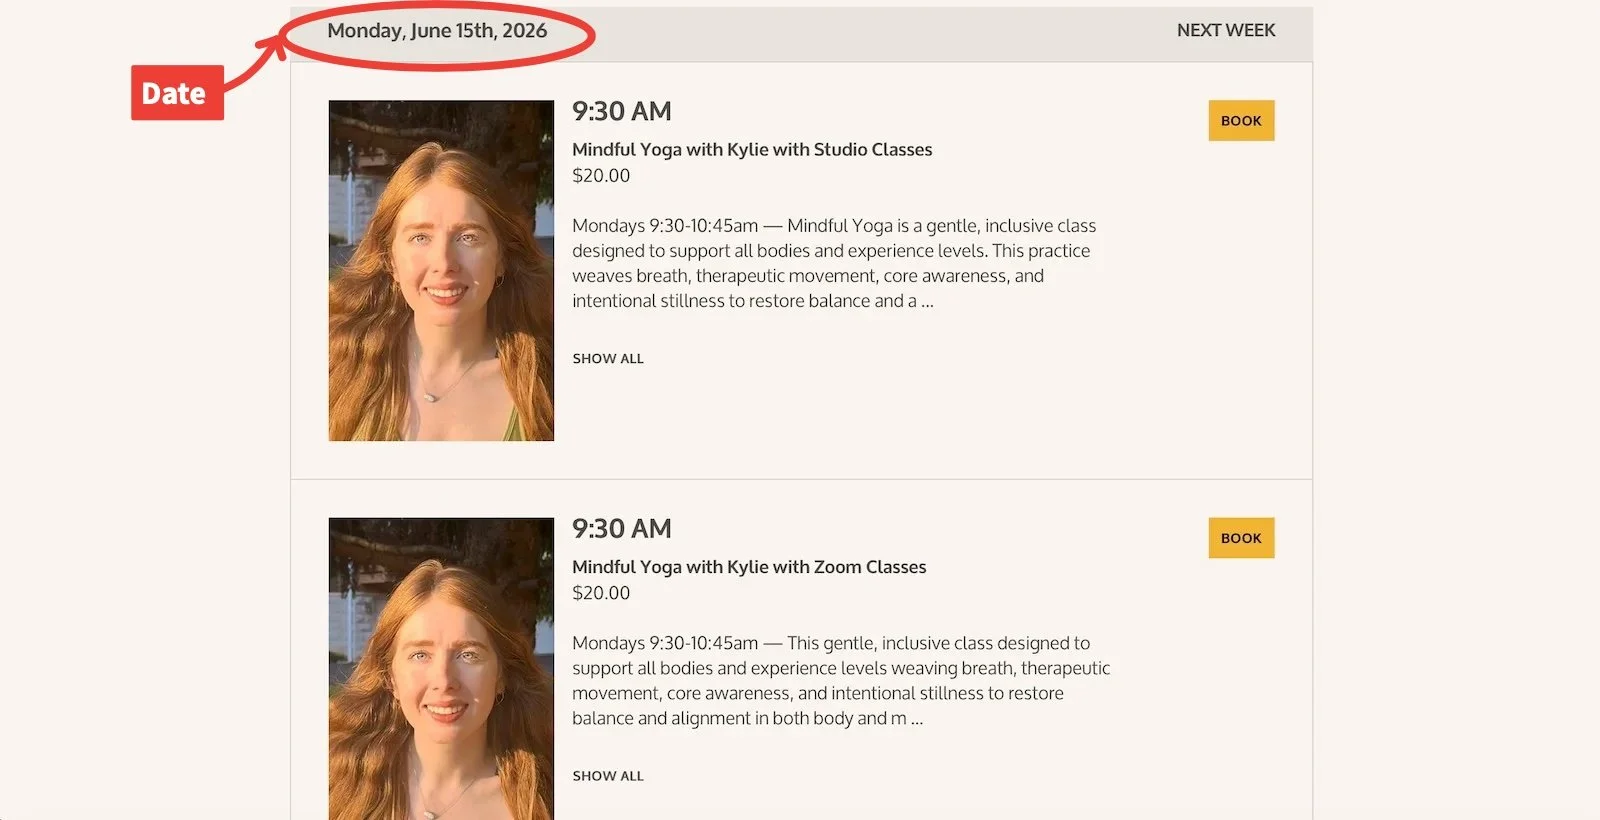
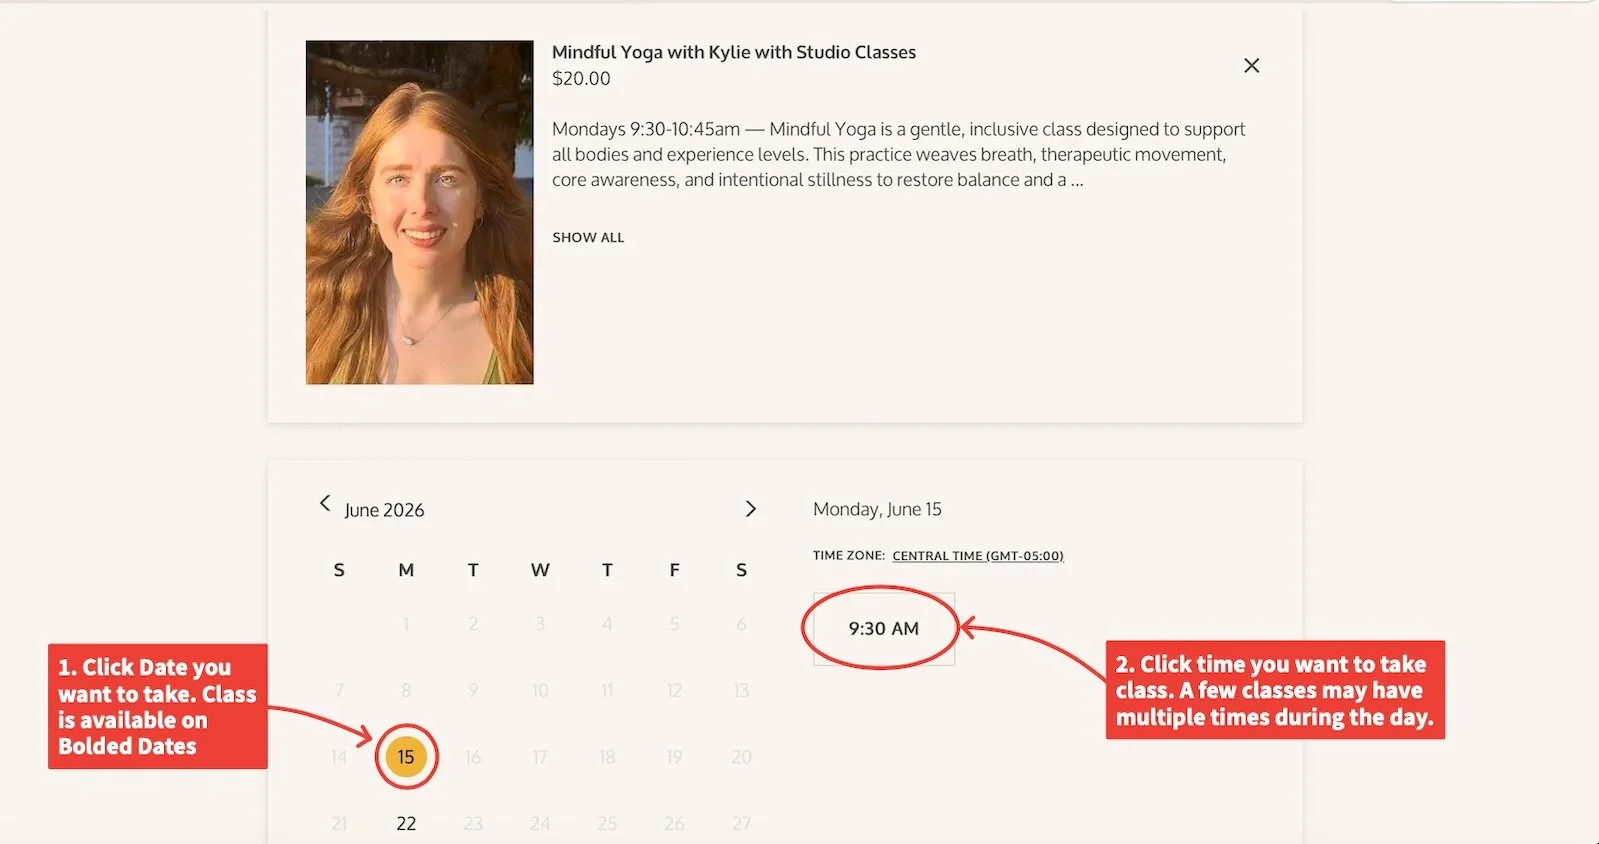
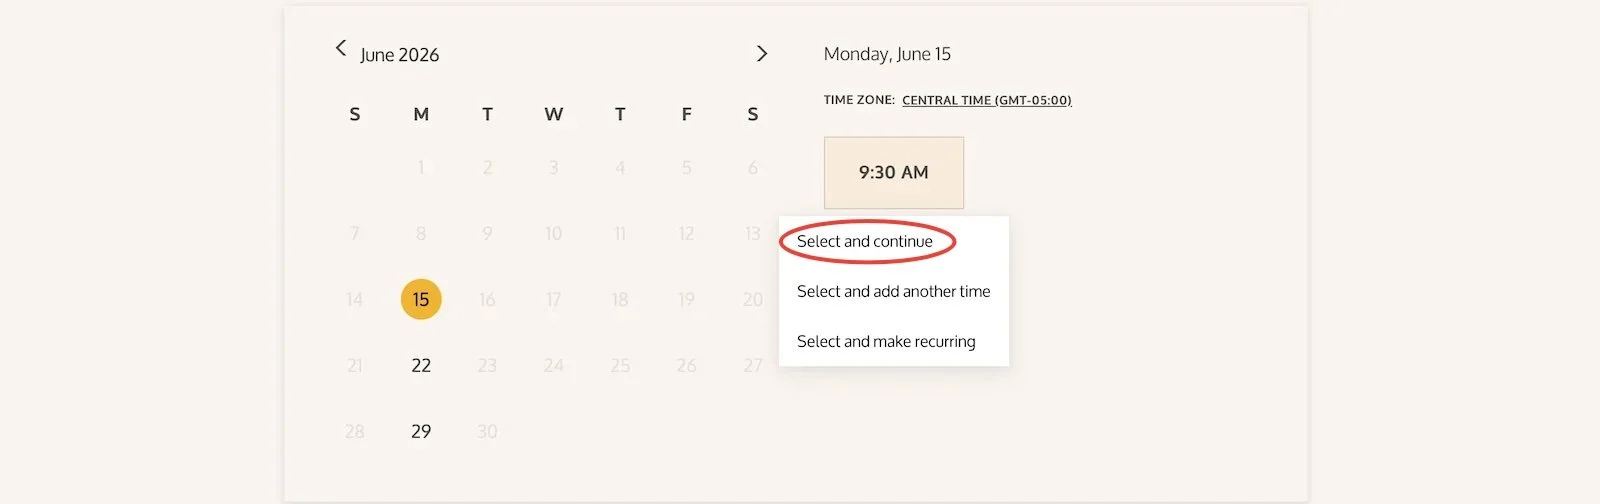
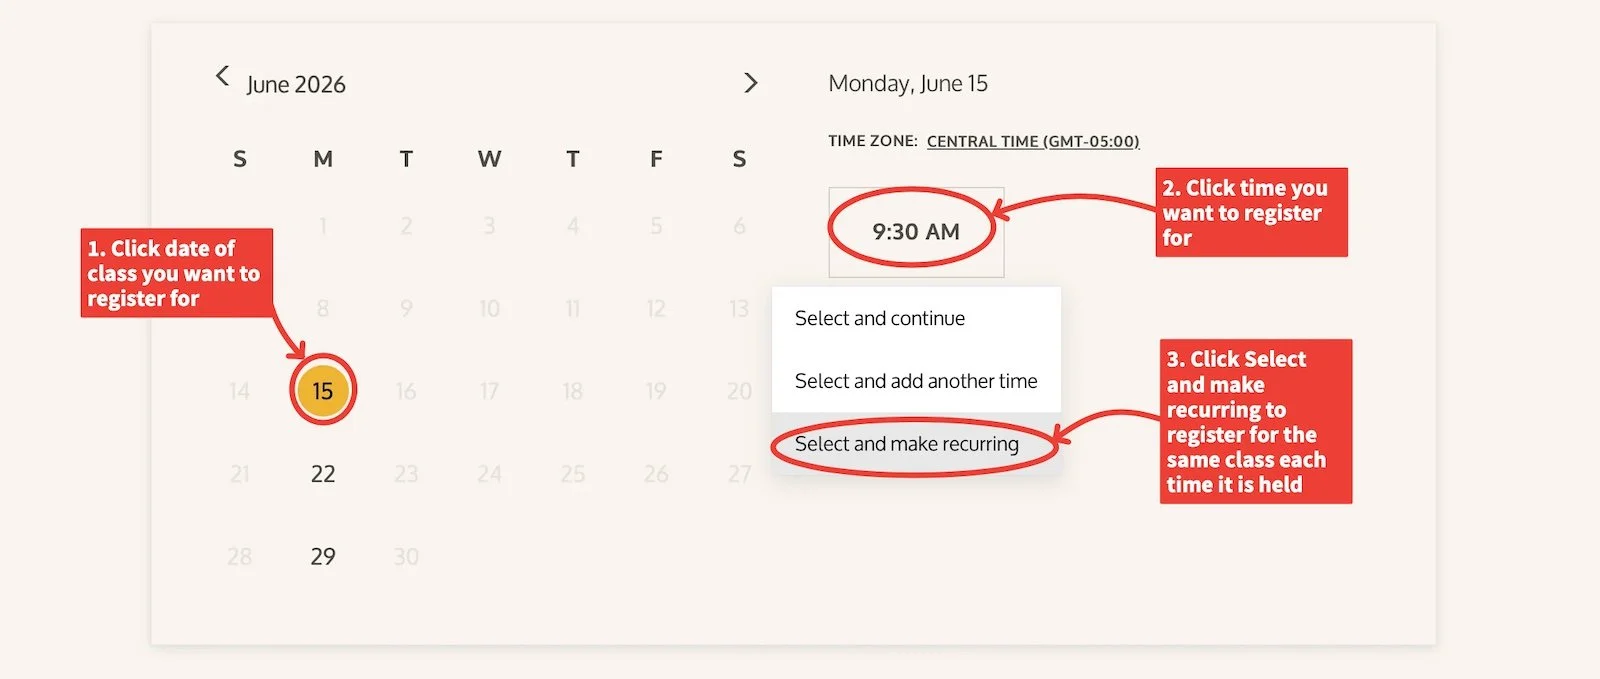
Step 5: Choose a date and time
After you select a class, you will see a calendar.
Available class dates will appear on the calendar. Click the date you want.
Then click the class time.
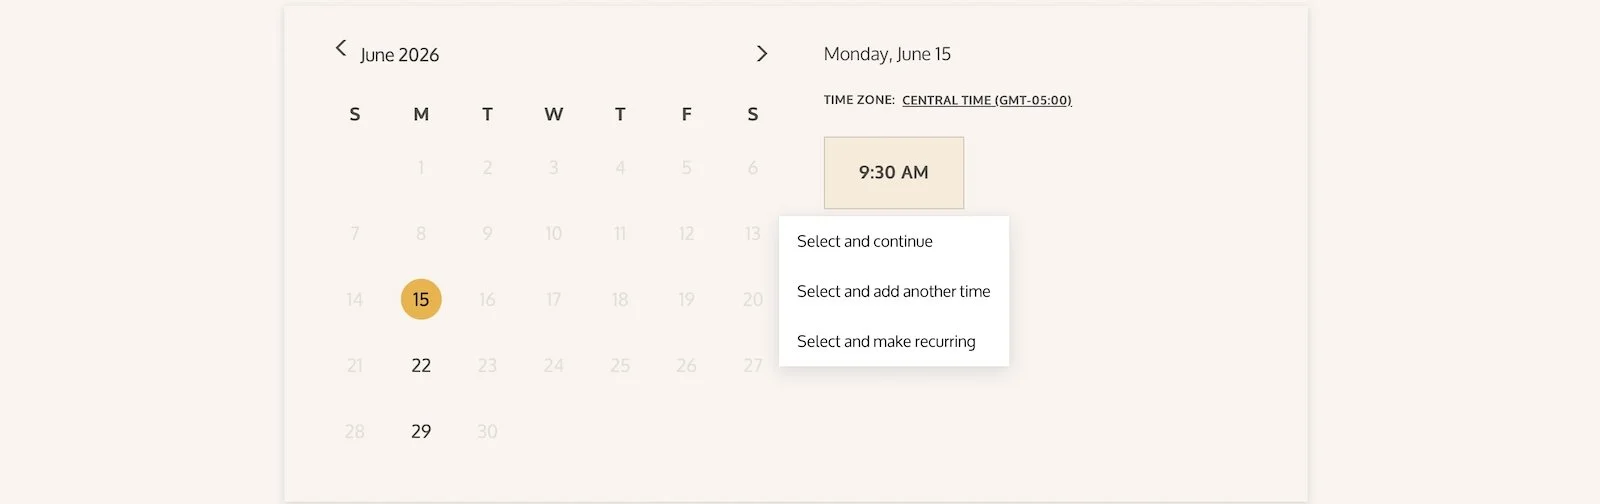
Step 6: Choose how you want to register
After you click the class time, you may see three options:
Select and continue
Choose this if you want to register for one class date.
Select and add another time
Choose this if you want to add more dates yourself.
Select and make recurring
Choose this if you want to register for the same weekly class several times.
You only need to choose one of these options. Use the option that matches how many class dates you want to register for.
Step 7: If registering for one class date
If you are only registering for one date, click:
Select and continue
You will move to the information form.
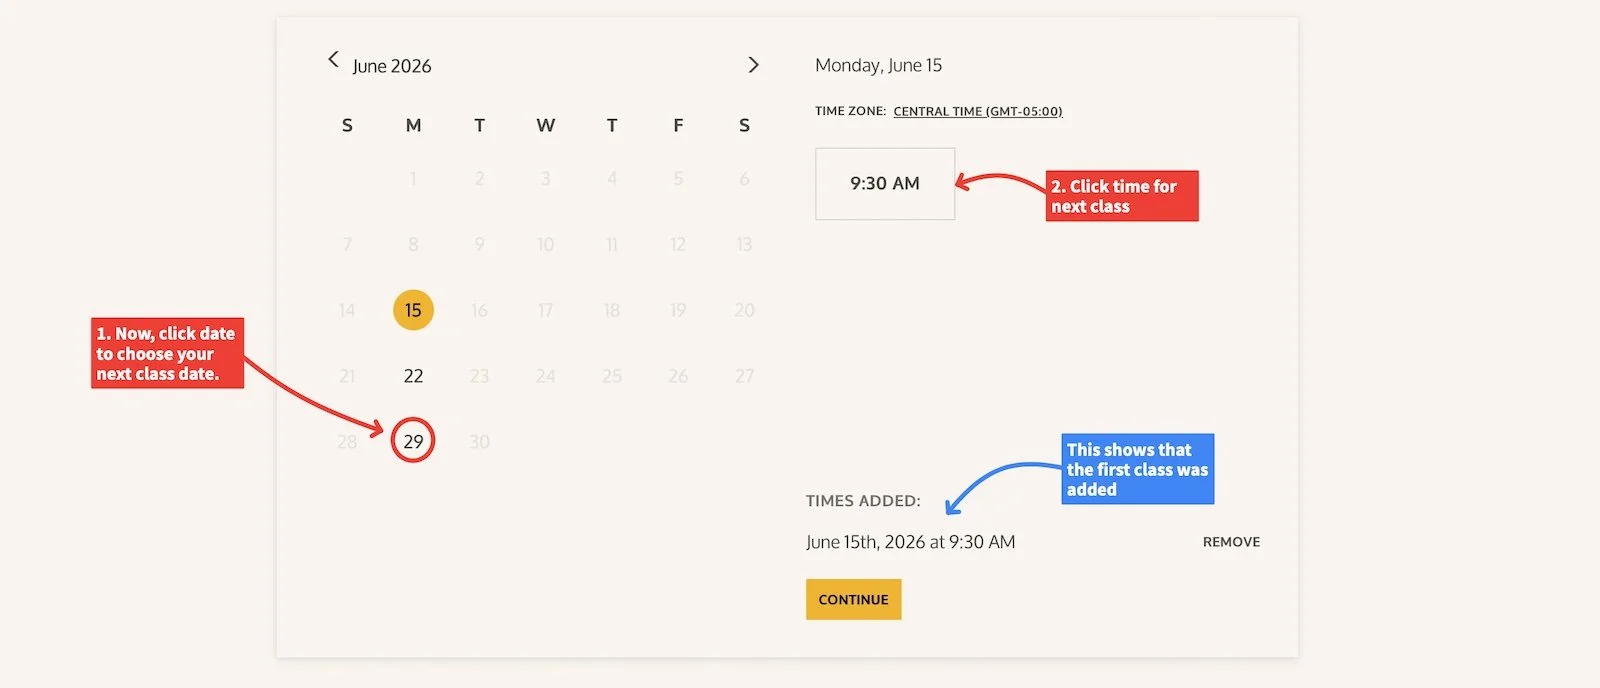
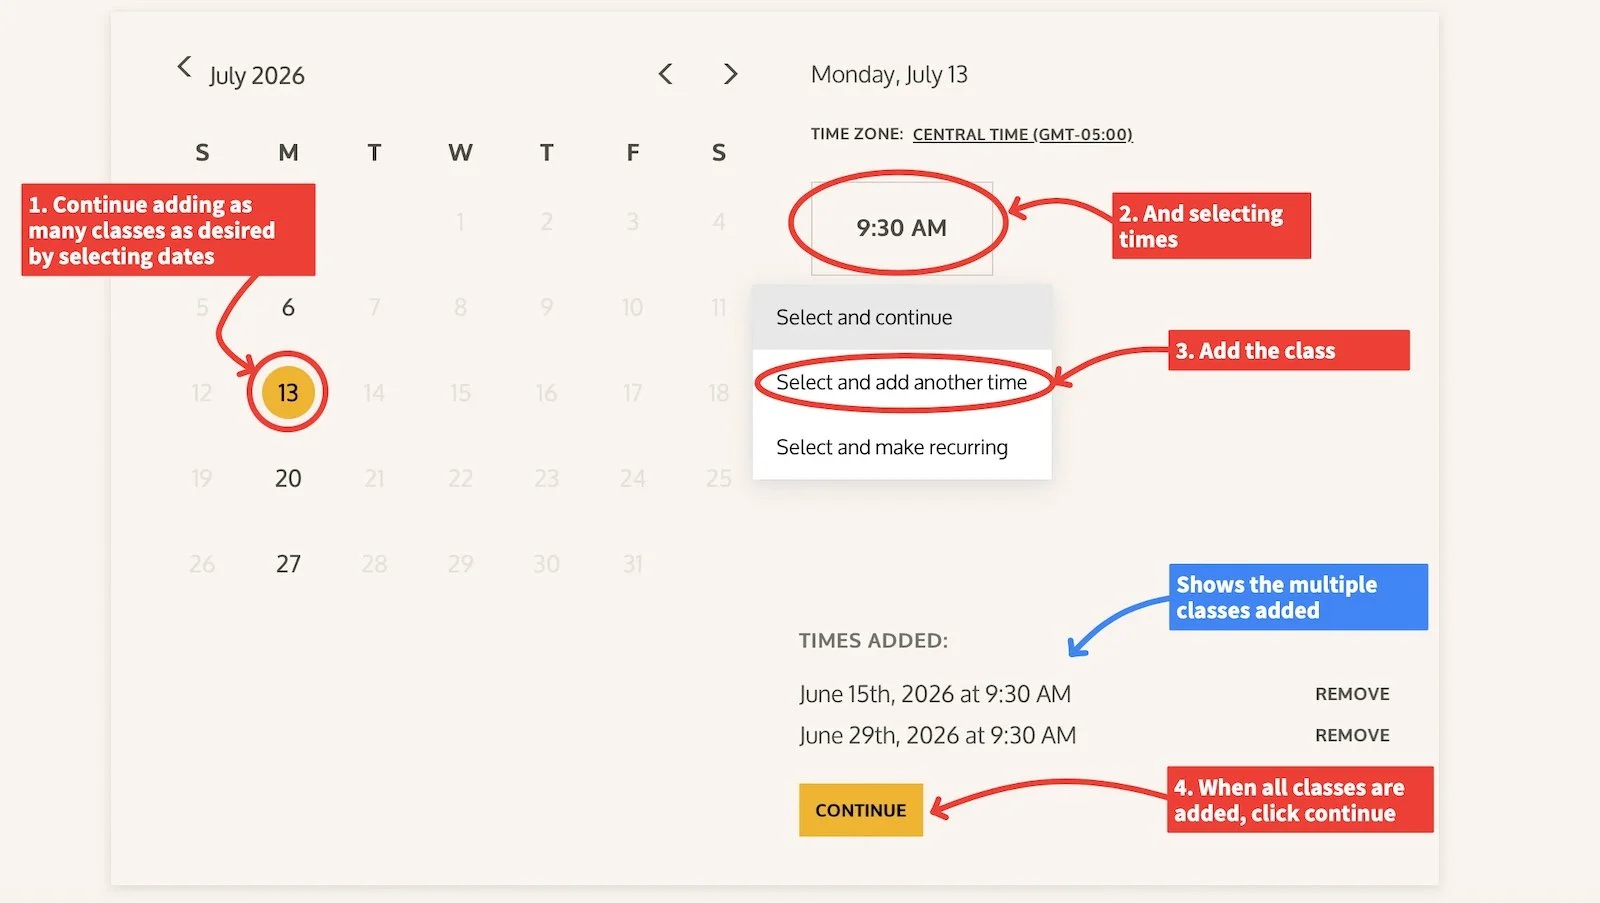
Step 8: Because students may add more than one additional date.
If you want to choose more than one date, click:
Select and add another time
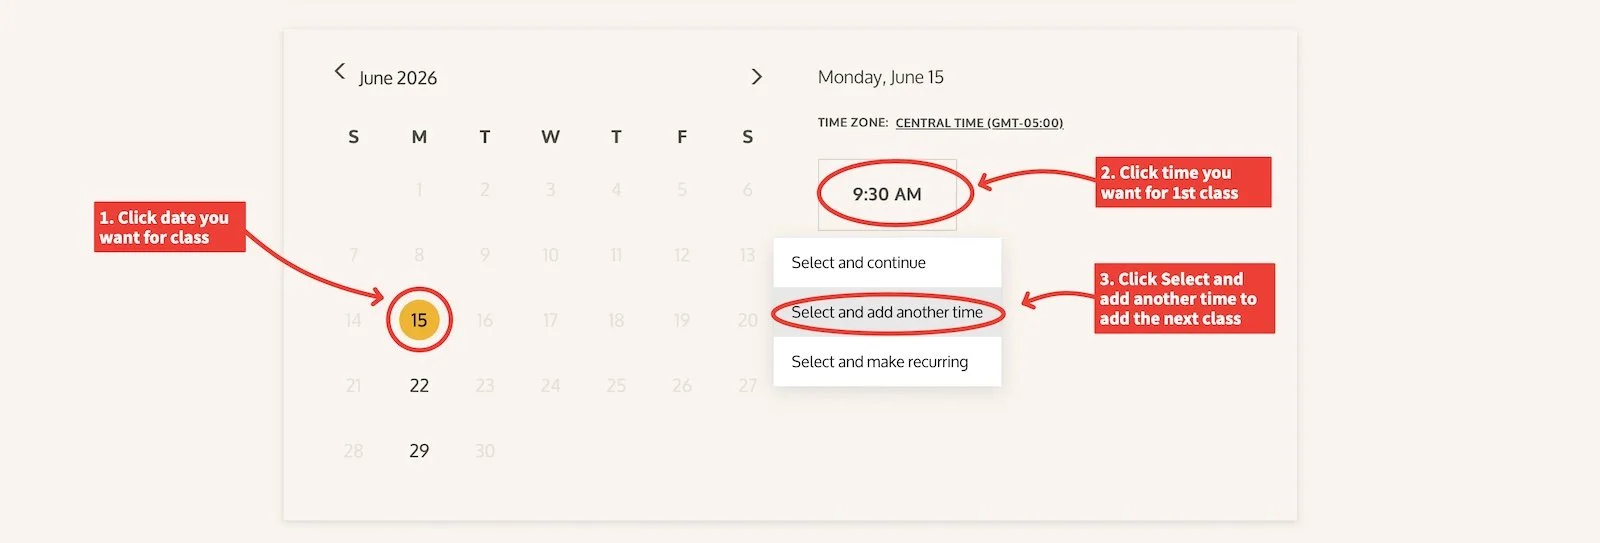
The first date will be added to your list. You can then click another available date on the calendar and choose the class time again.
You may repeat this until you have added the dates you want.
When you are finished, click:
Continue
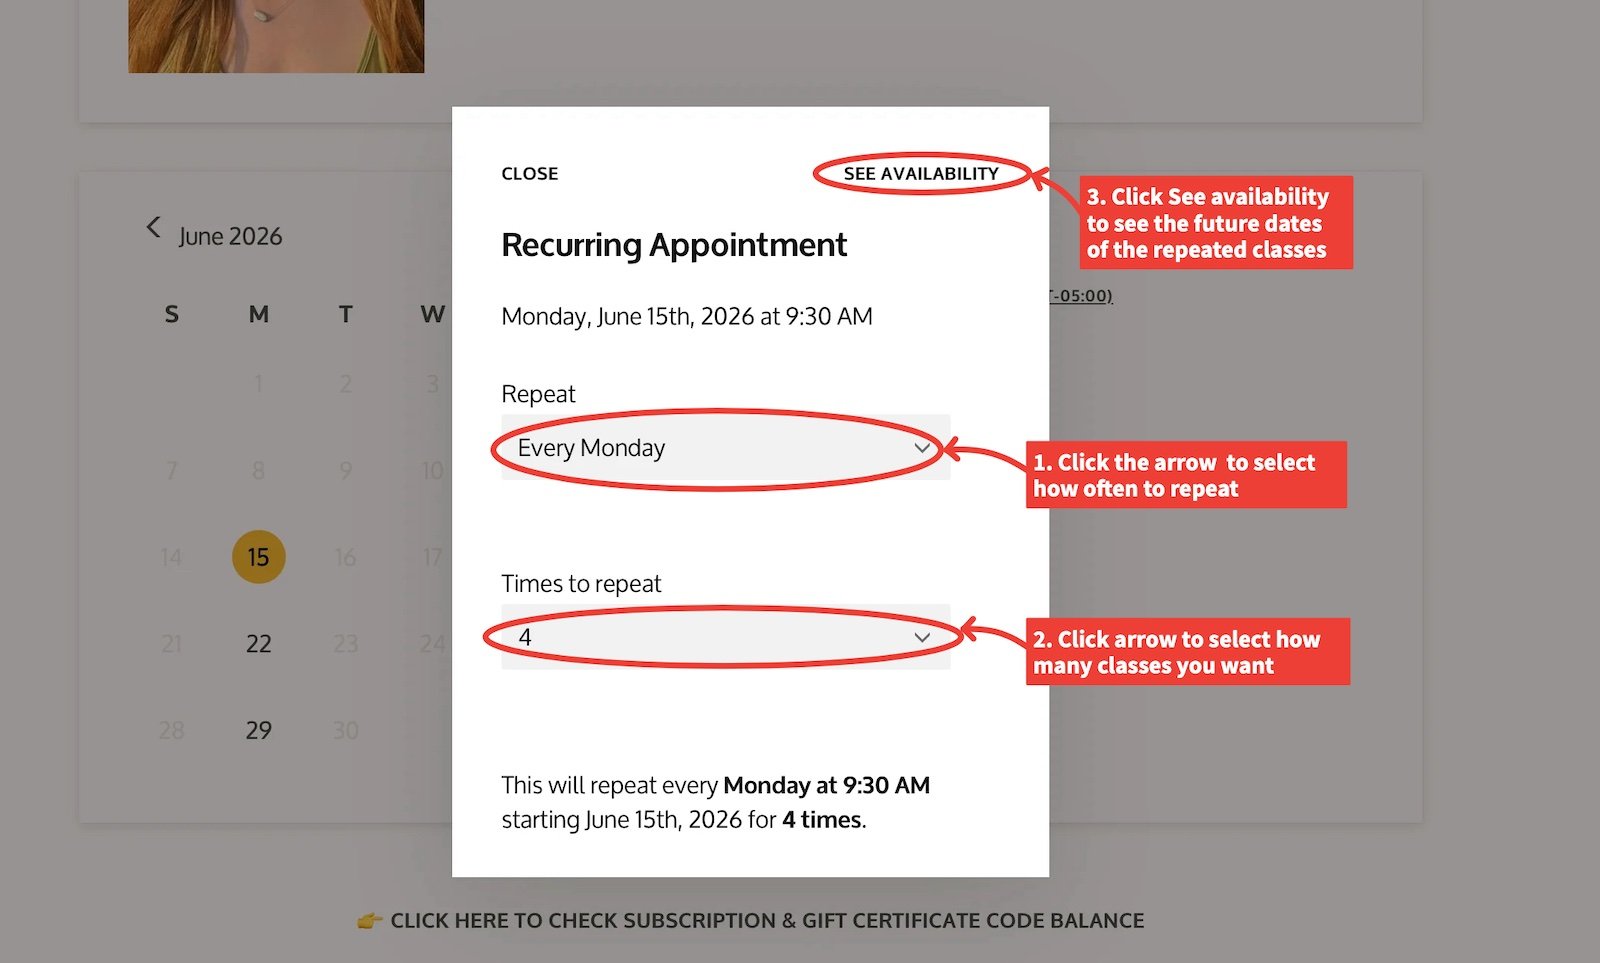
Step 9: If making the class recurring
If you want to register for the same class for several weeks, click:
Select and make recurring
A recurring appointment window will open.
You may be able to choose:
How often the class repeats
How many times you want to repeat it
After choosing your recurring options, click:
See Availability
You will then see the dates that will be added.
Please review the dates carefully —before clicking Add Appointments.
Unavailable times will not be added.
If the dates look correct, click:
Add Appointments
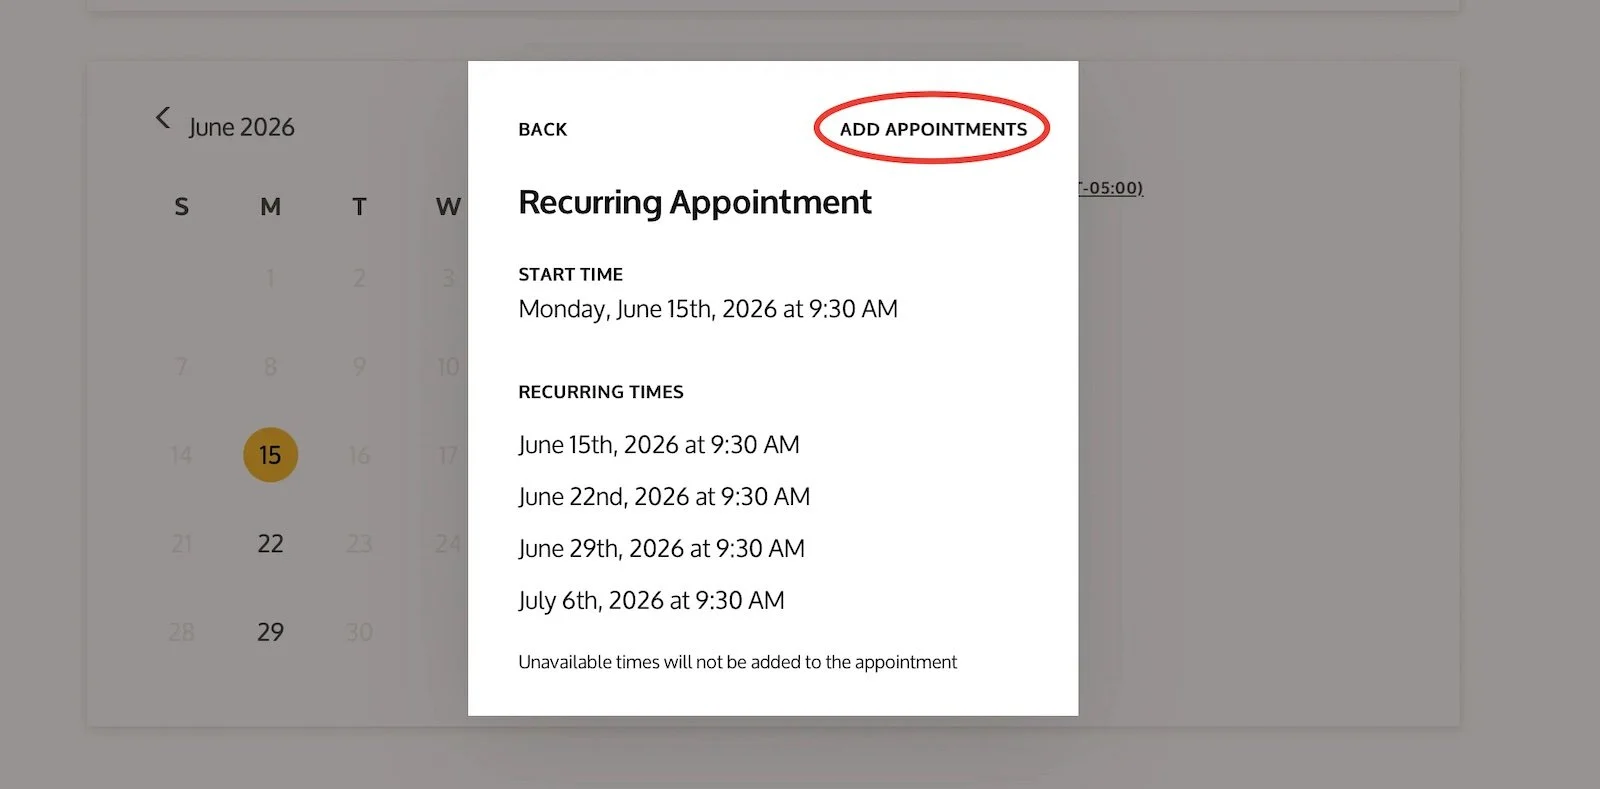
You will return to the registration page and see the dates added to your appointment list.
Then click:
Continue

Step 10: Review the class or classes you selected
Before entering your information, review the class details at the top of the page.
Please check:
The class name
The teacher
Whether you selected the correct category: In Studio Classes or Livestream Classes
If anything looks incorrect, use the X in the upper right of the class box to remove the selection and start again.
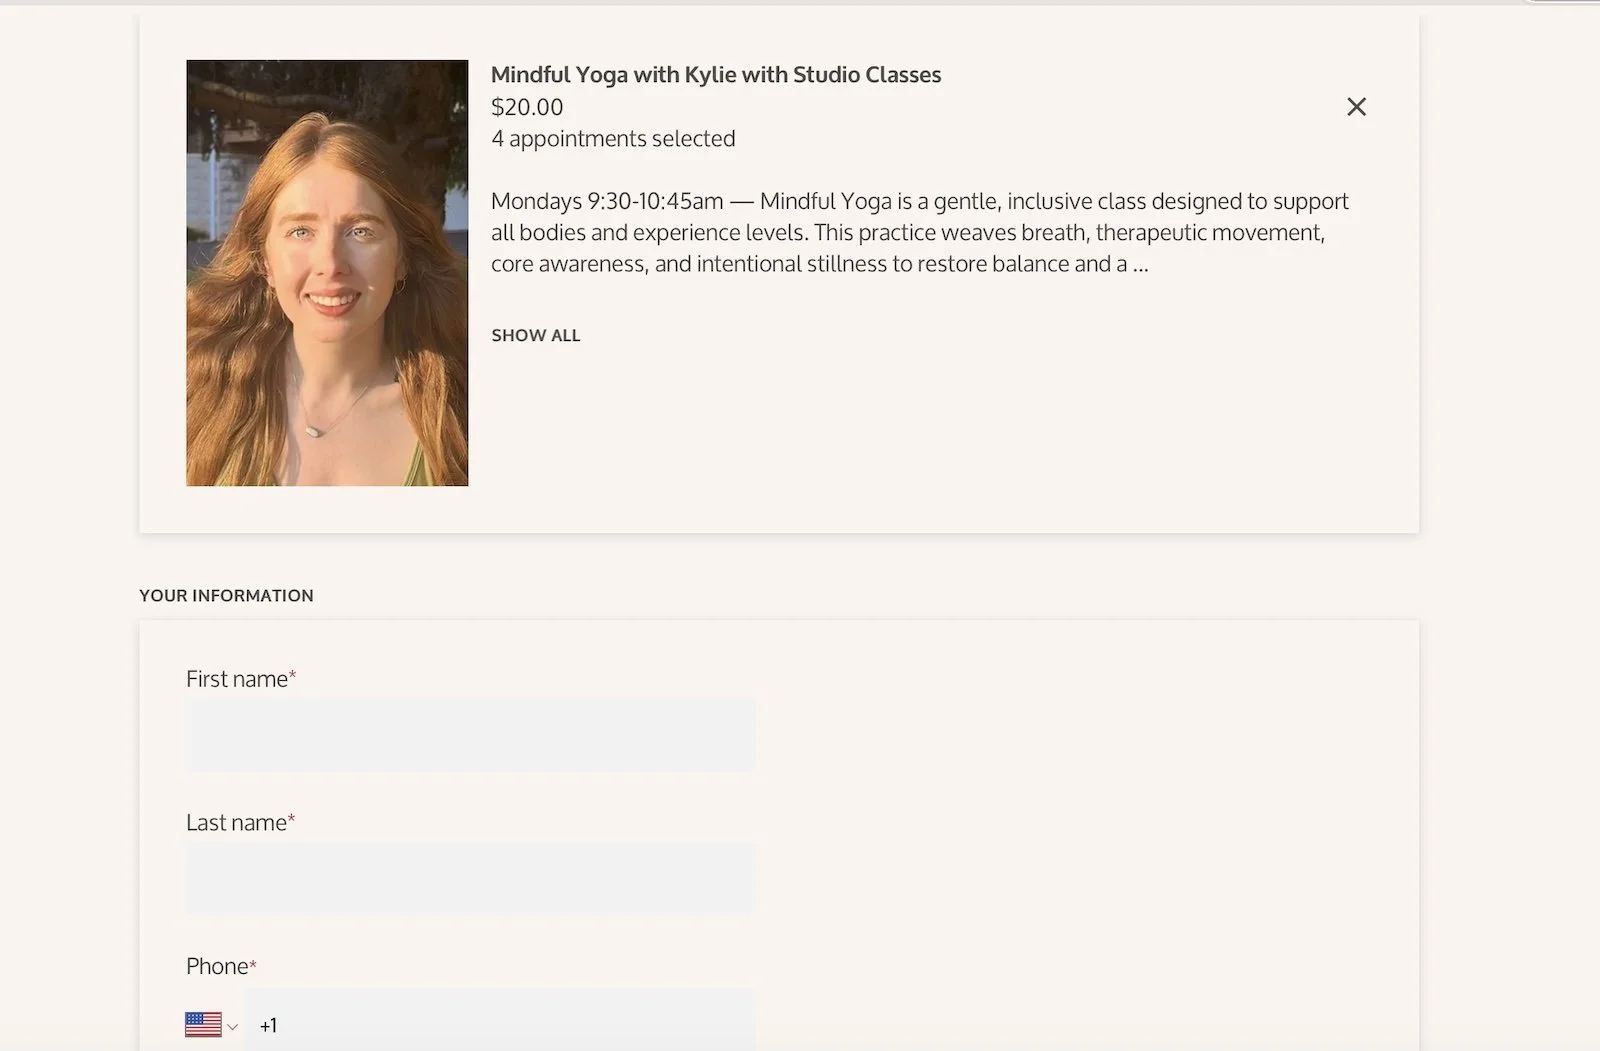
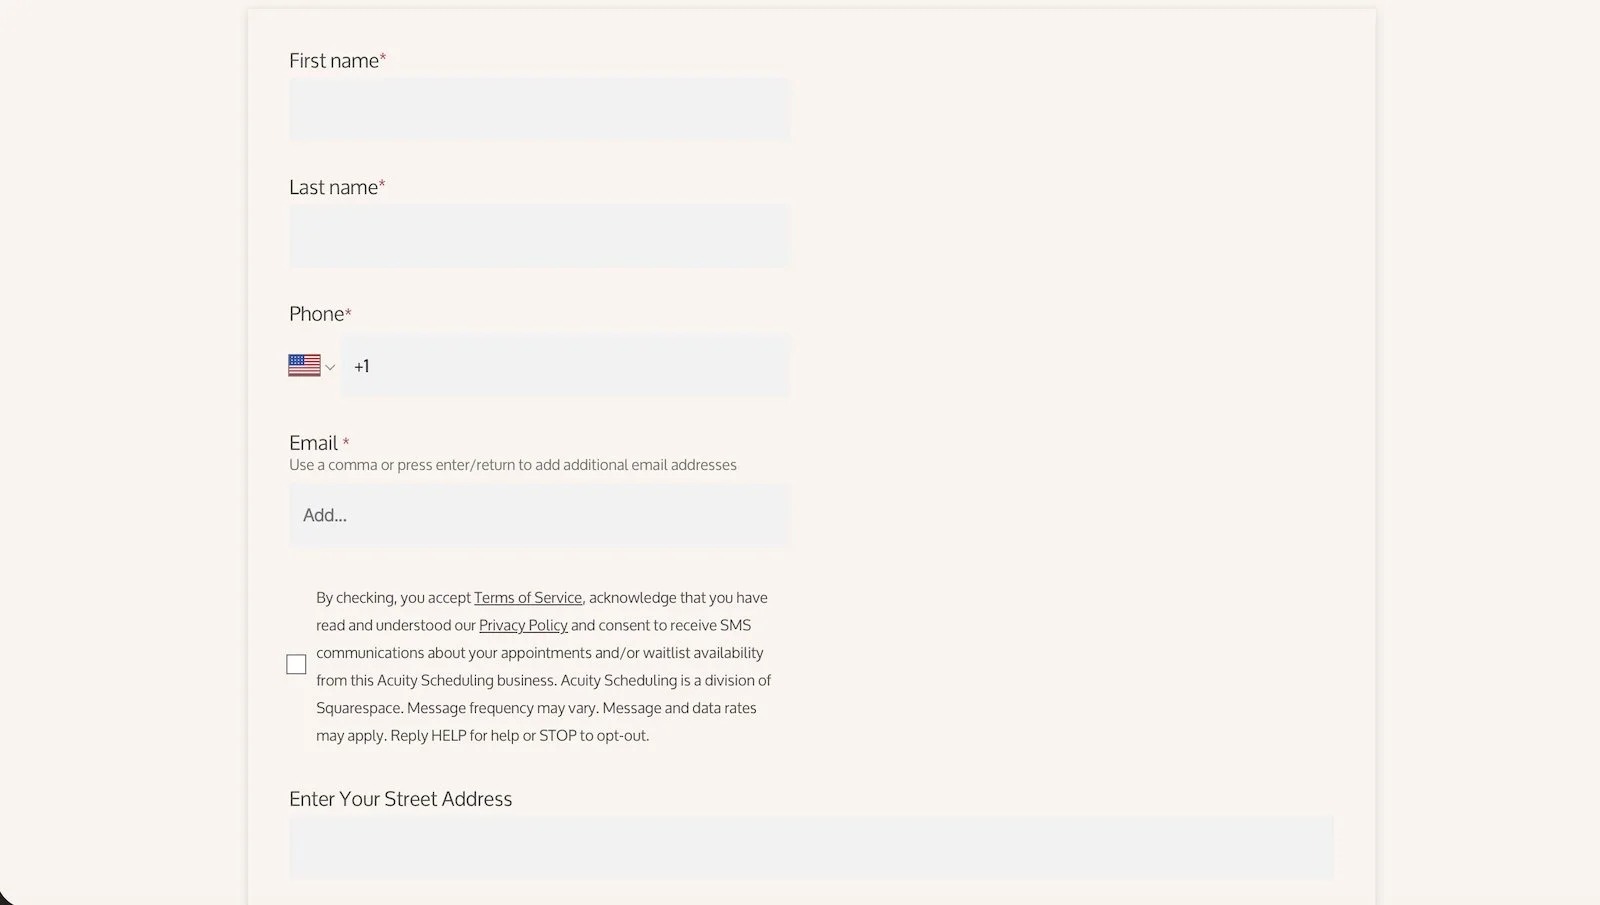
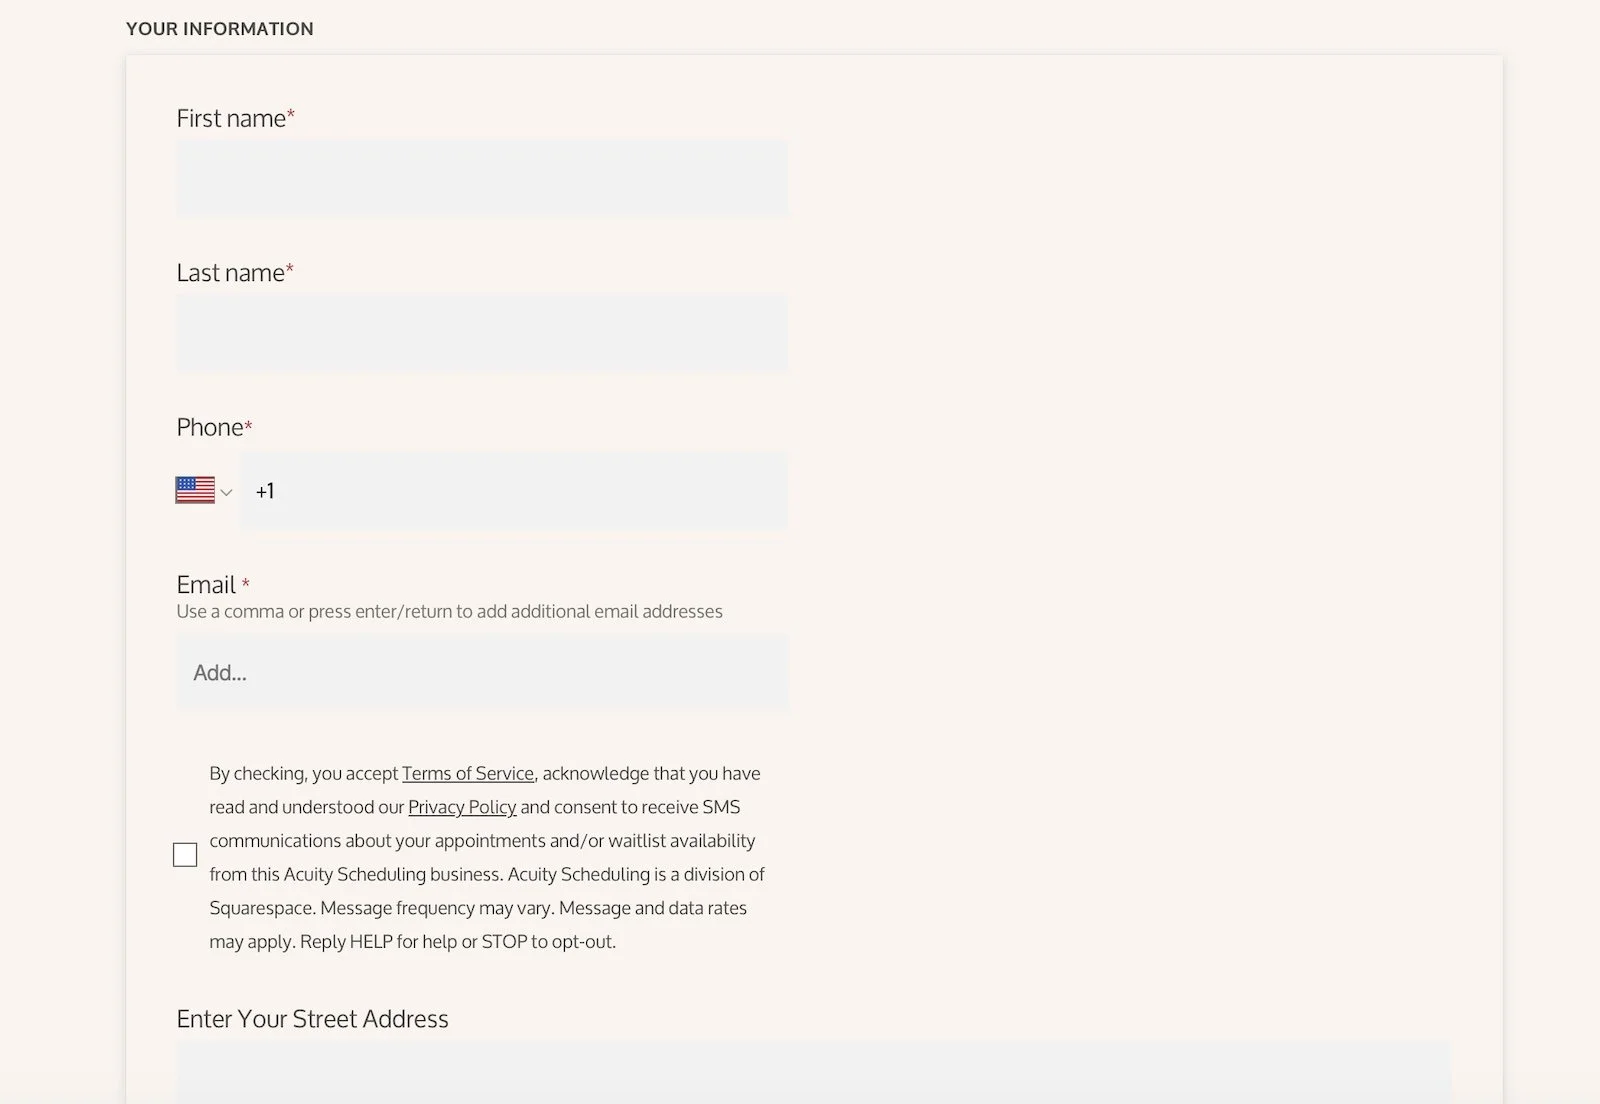
Step 11: Enter your information
Fill in the required fields, including:
First name
Last name
Phone
Email
Street address
You will also see checkboxes for studio policies and email list acknowledgment.
Please read and check the required boxes before continuing.
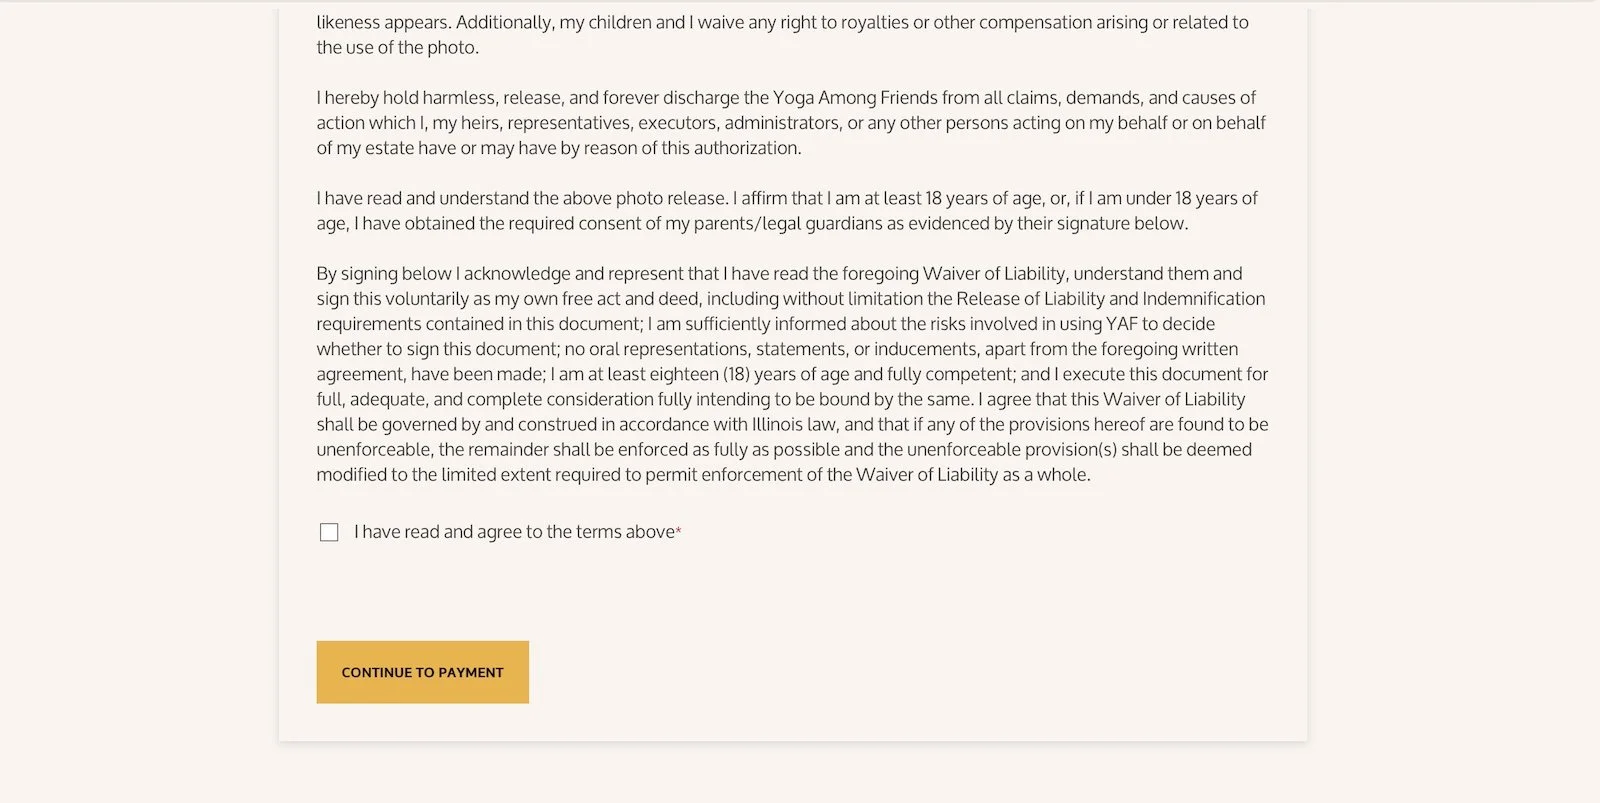
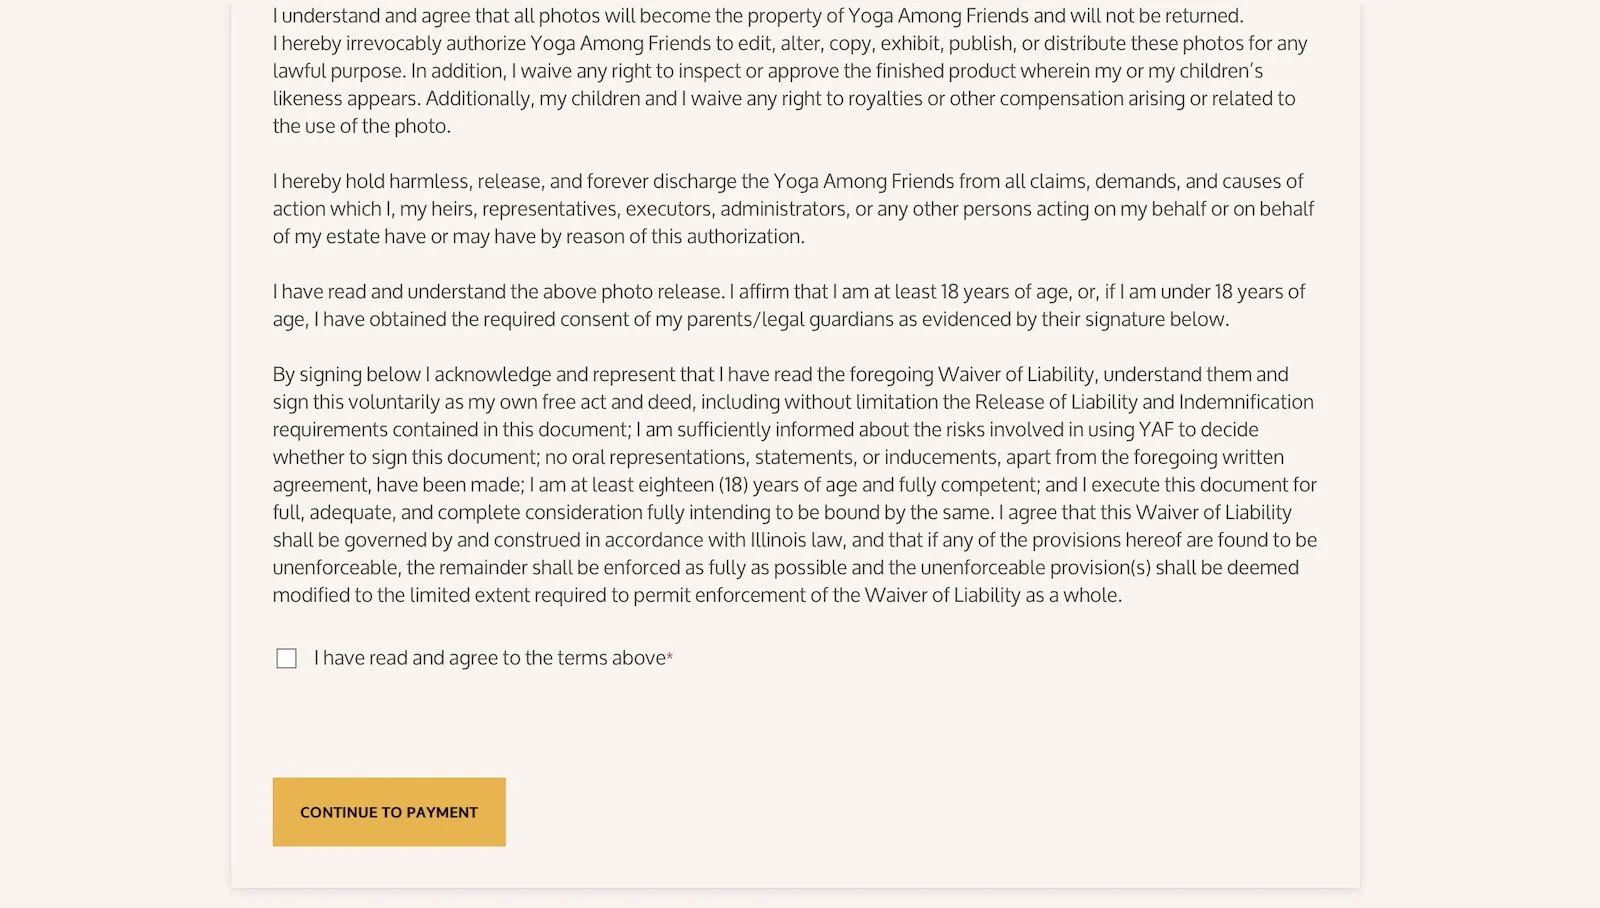
Step 12: Agree to the terms
Near the bottom of the form, you will see the studio waiver and policies.
Check the box that says:
I have read and agree to the terms above
Then click:
Continue to Payment
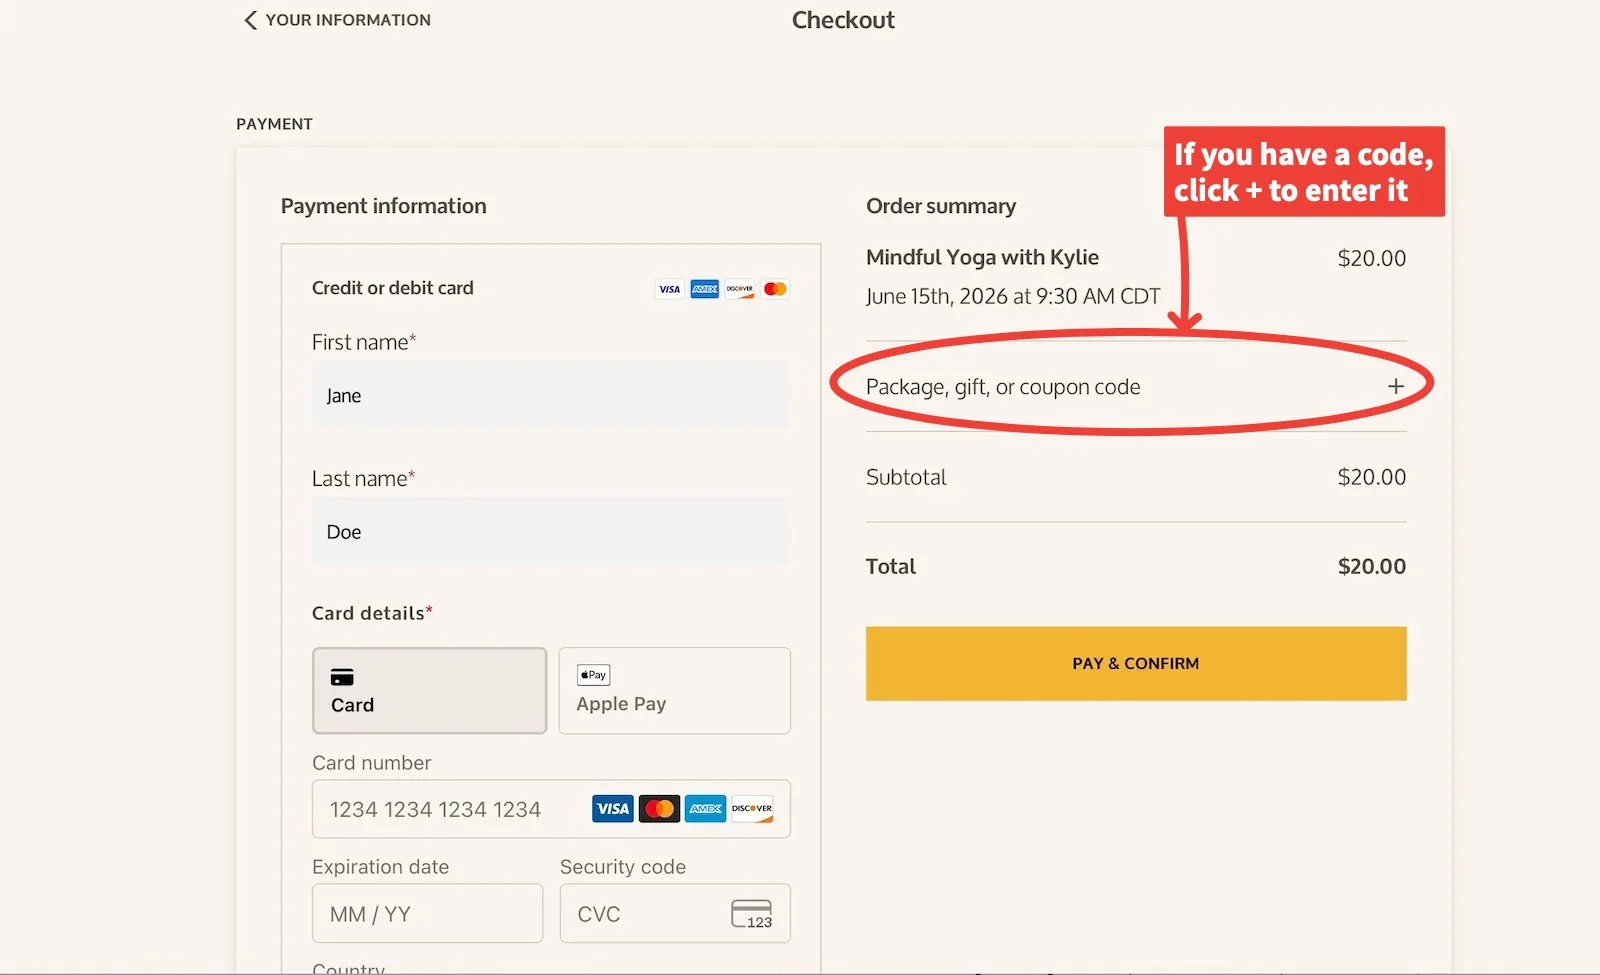
Step 13: Enter payment or use a package, gift, or coupon code
On the checkout page, you will see your order summary.
If you are paying for your class registration, enter your credit or debit card information, then click:
Pay & Confirm
If you have a subscription, gift certificate, or coupon code, look for:
Package, gift, or coupon code
Click the plus sign, enter your code, and click Apply.
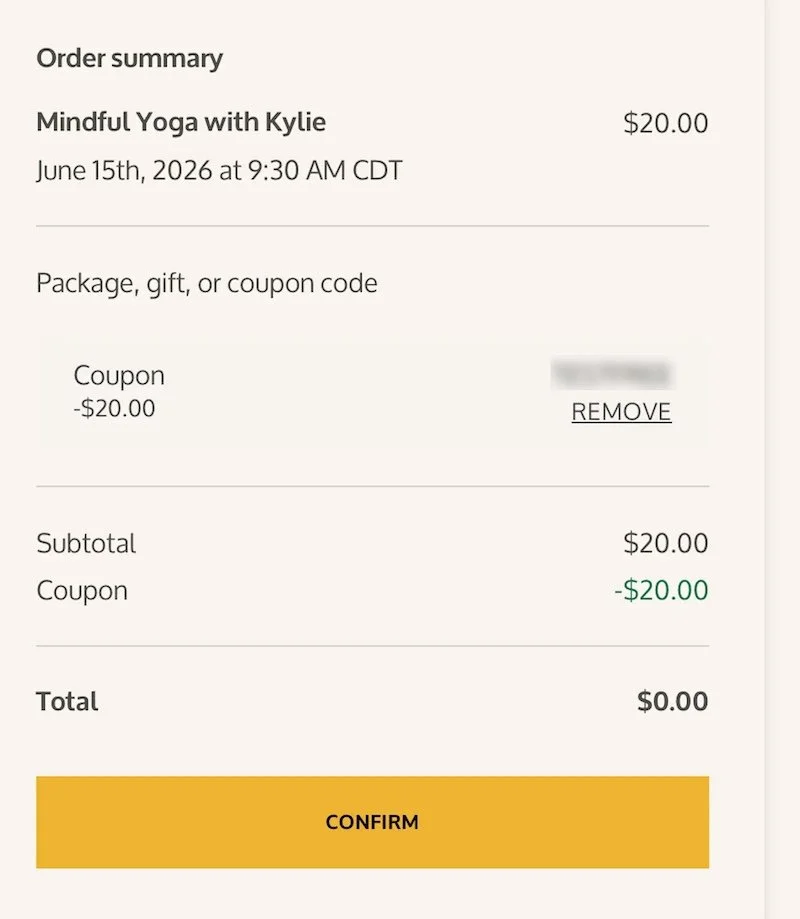
Step 14: Confirm your registration
After your payment or code is accepted, click:
Pay & Confirm
or, if your total is $0 after applying a code:
Confirm
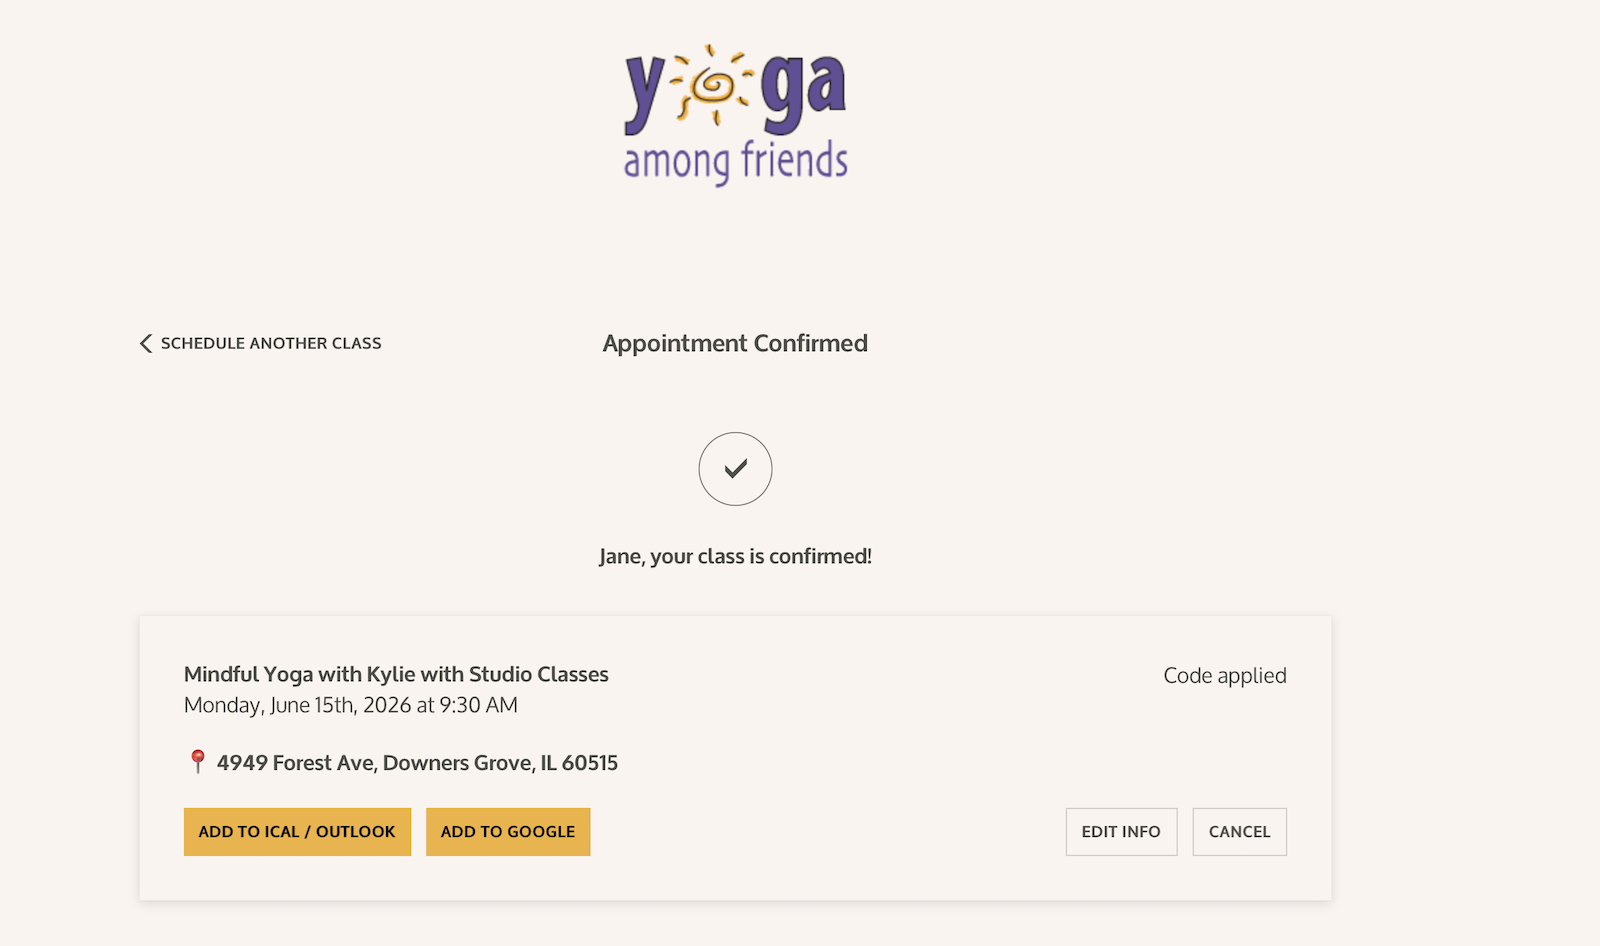
Step 15: Look for the confirmation screen
When your registration is complete, you will see a confirmation message that says:
Appointment Confirmed
or
Your class is confirmed
You may also see buttons to add the class to your calendar.
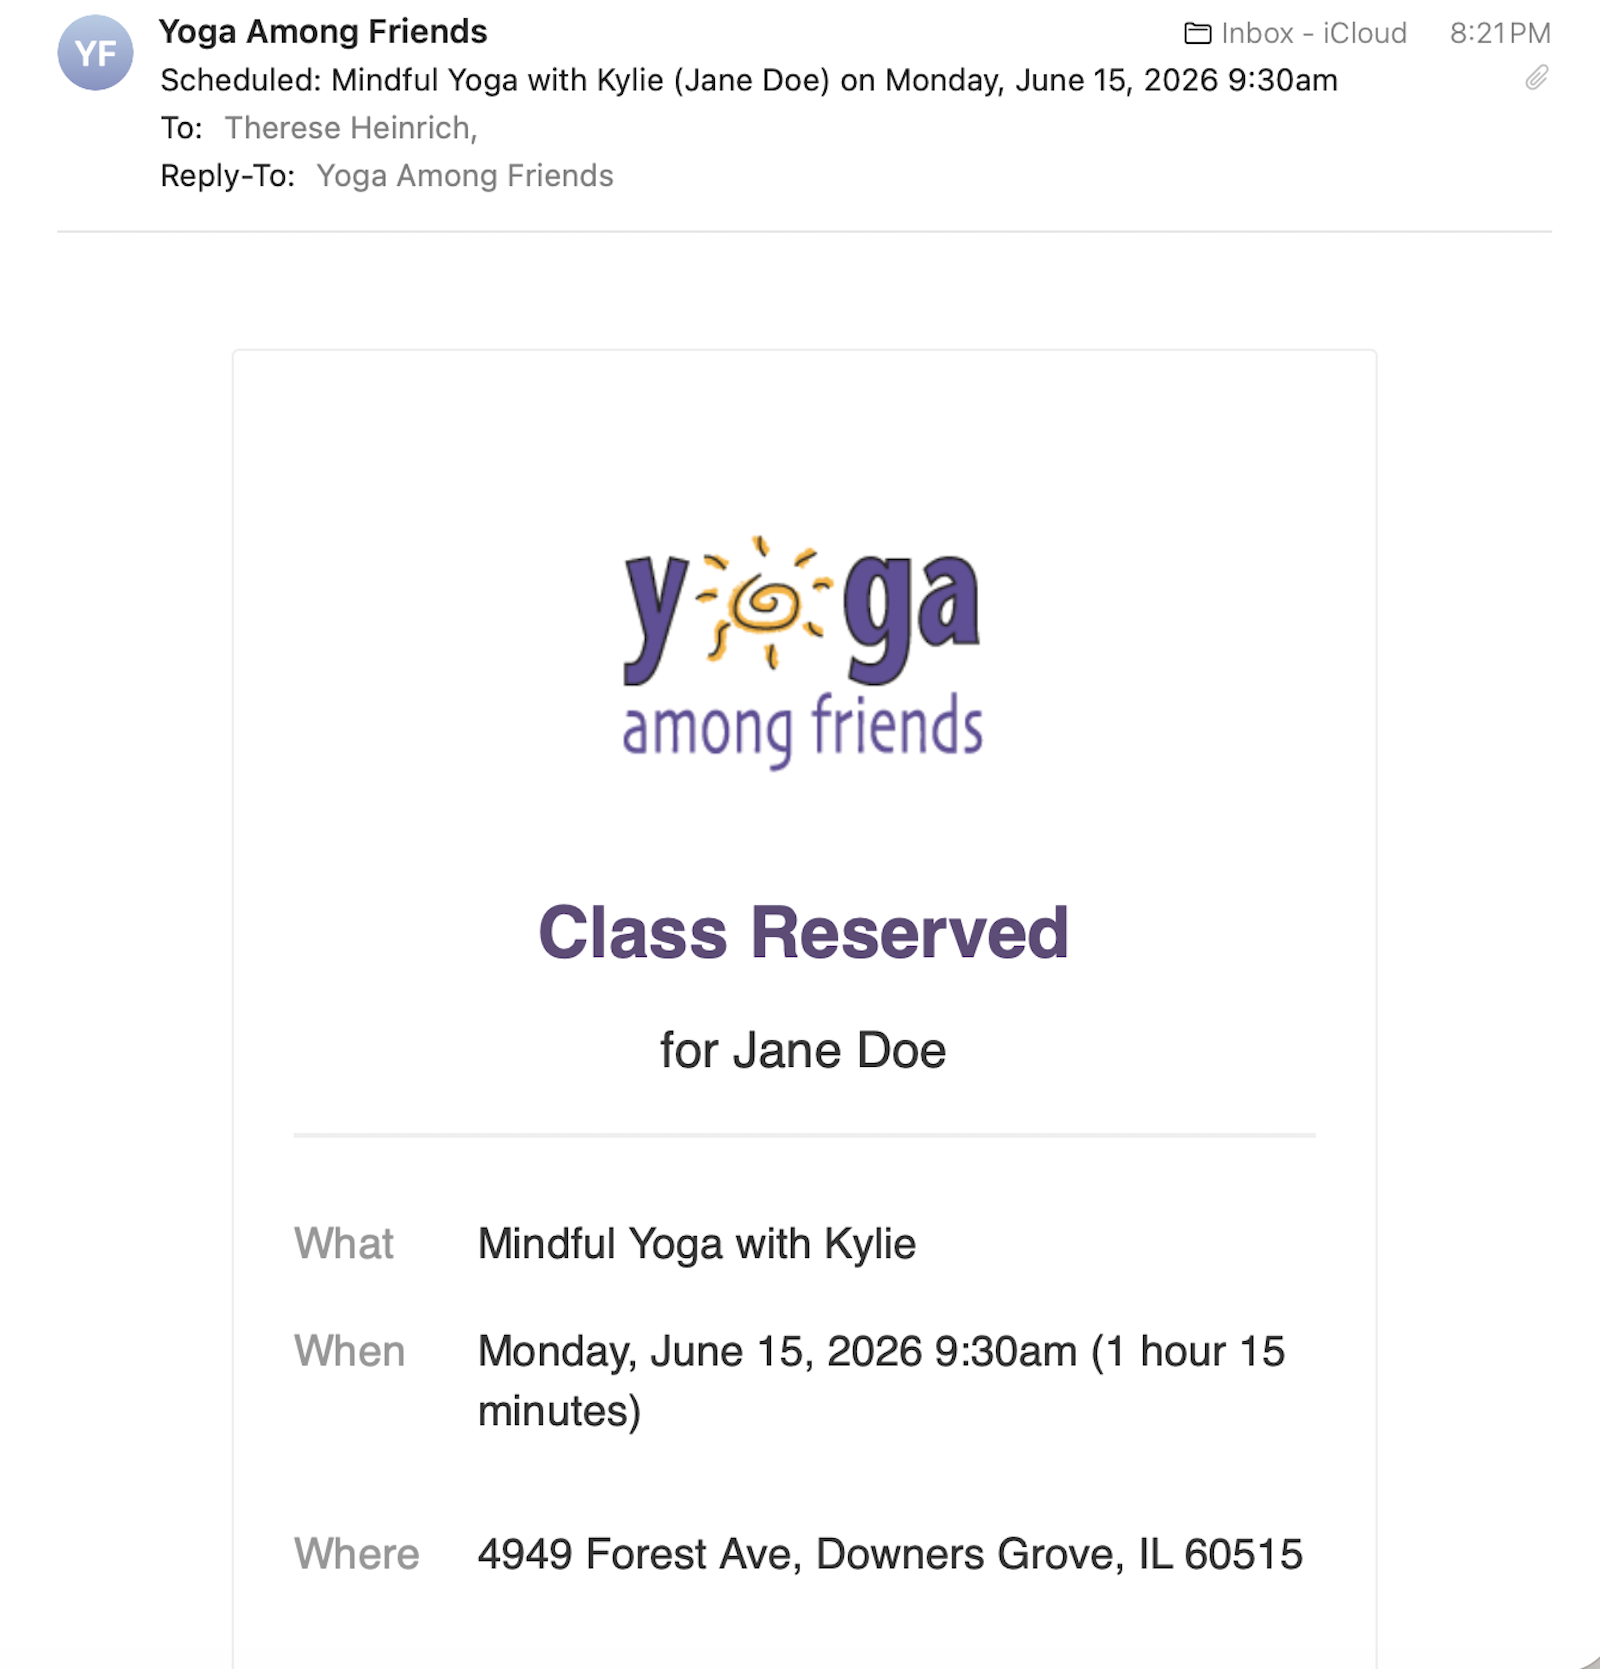
Step 16: Check your email
You will also receive a confirmation email from Yoga Among Friends.
The email will include:
The class name
The date and time
The studio address for in-person classes
A link to change or cancel your class
Calendar buttons, if you would like to add the class to your calendar
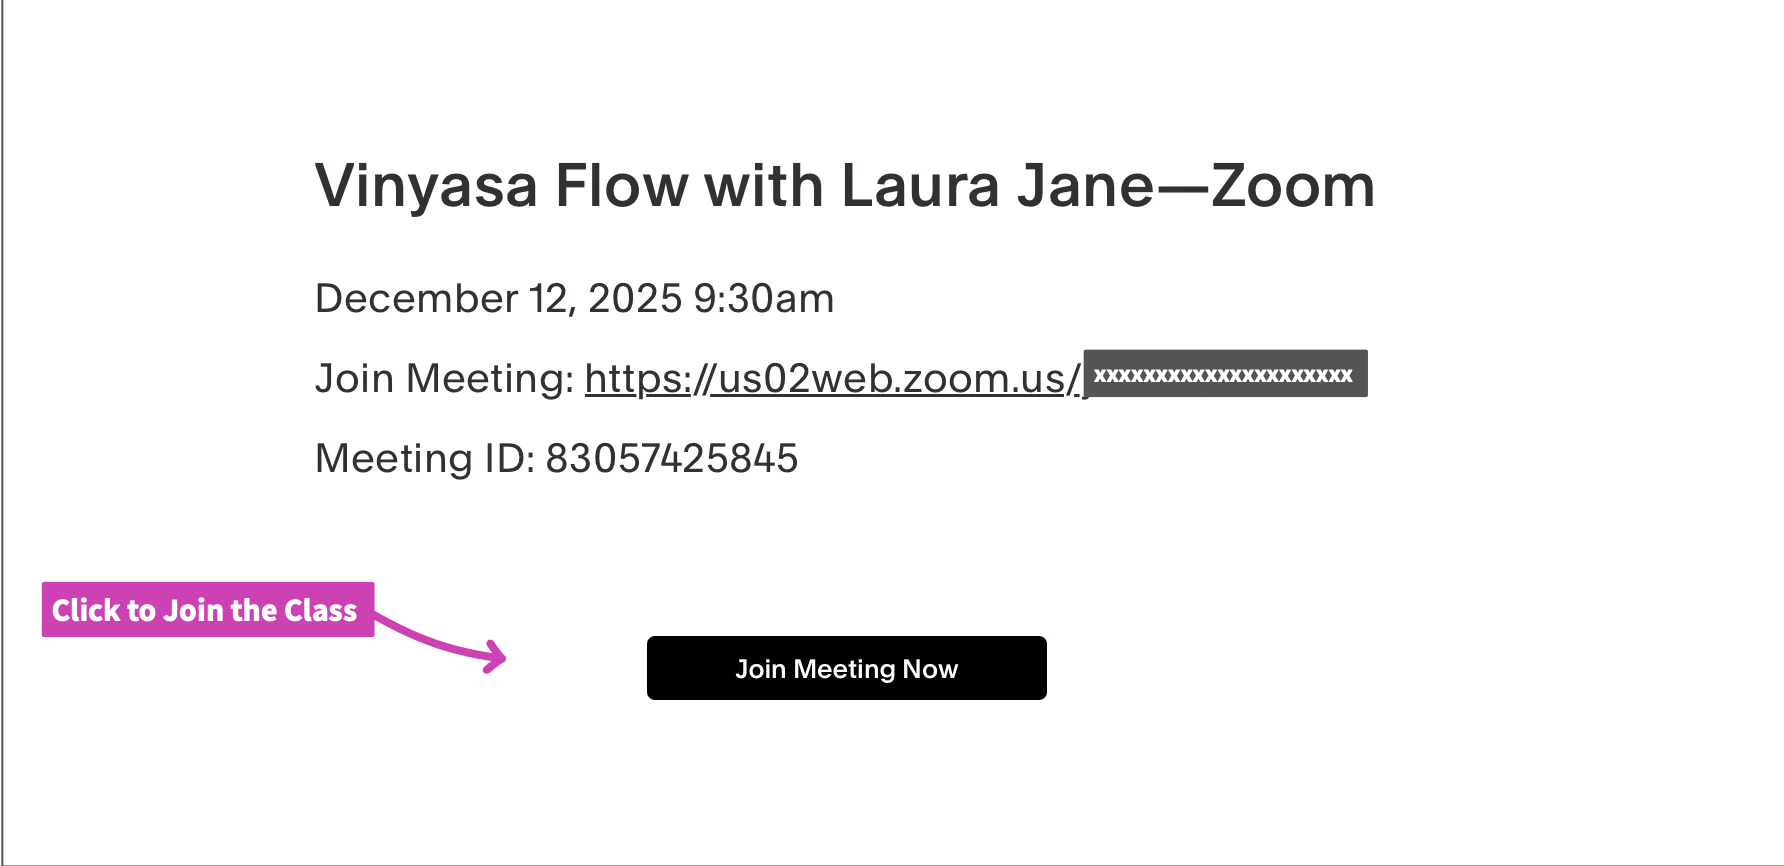
For Zoom classes, please watch your email for the Zoom class information.
Important note for Zoom students
Zoom classes are listed separately and usually appear directly after the matching studio class.
Once you’ve registered, your Zoom link is available in three possible places:
- Your initial confirmation email
- Your 24-hour and 2-hour reminder emails
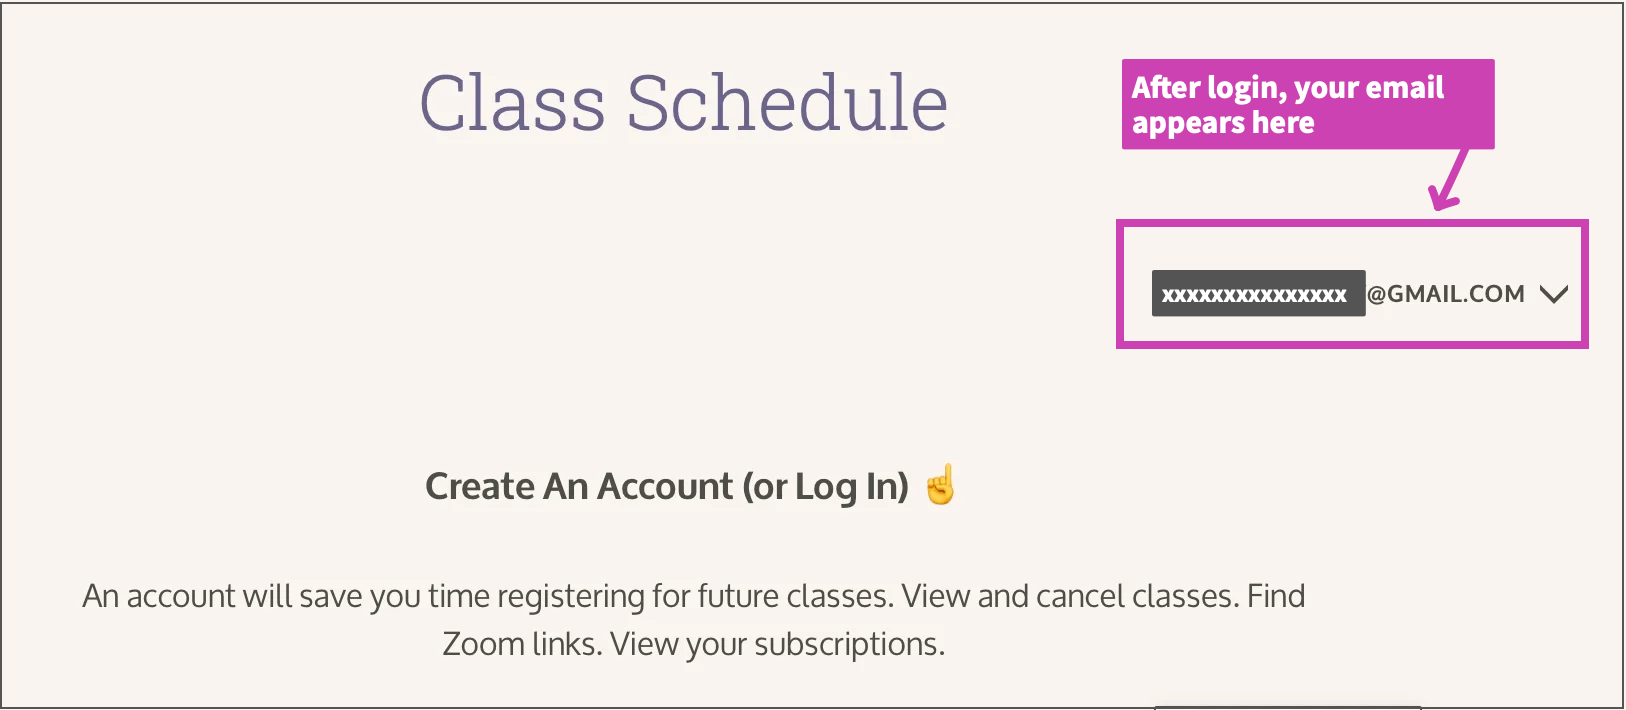
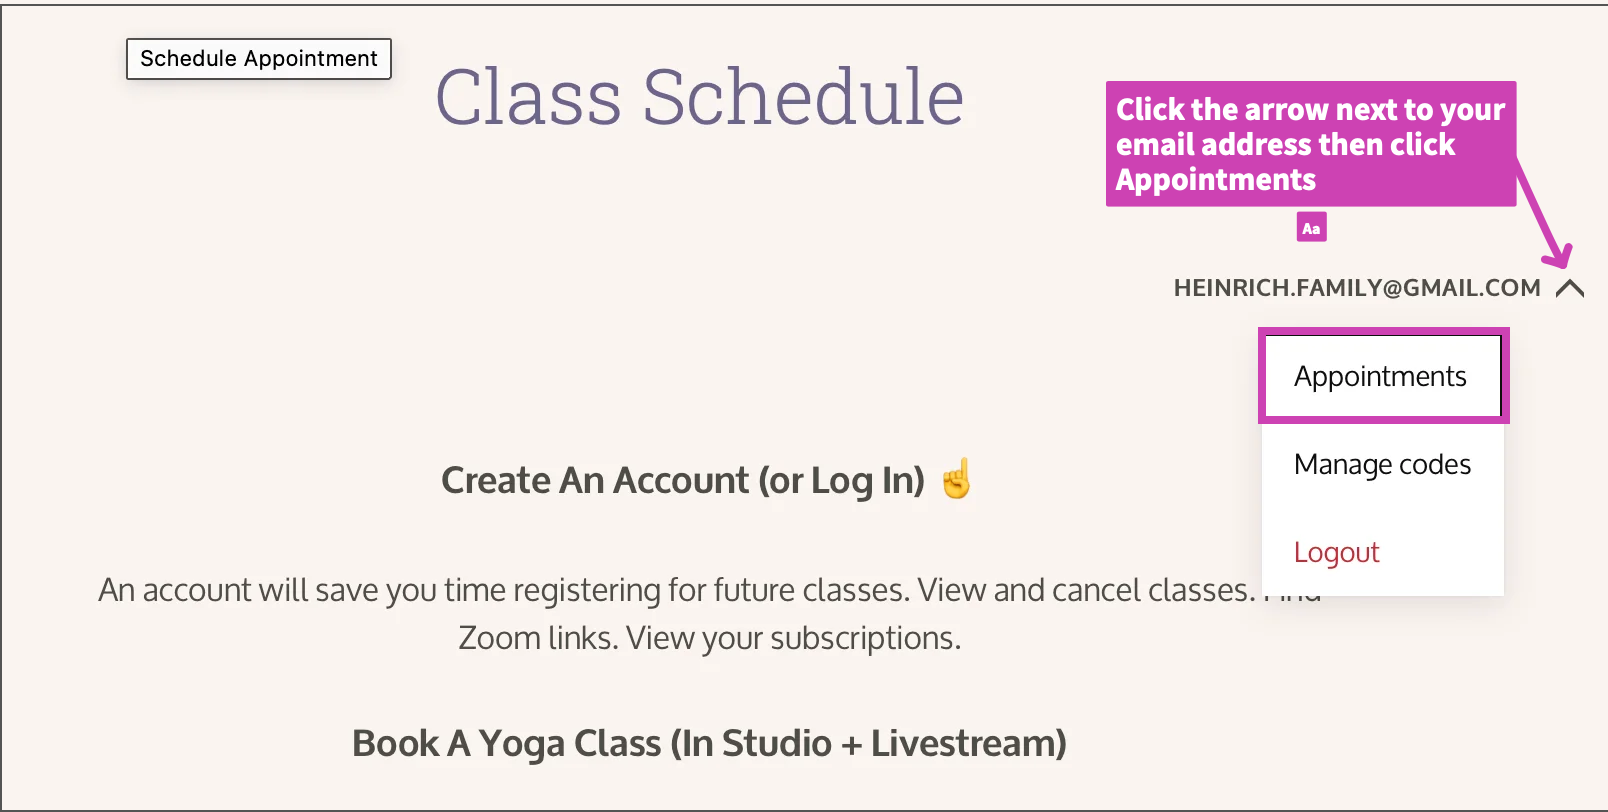
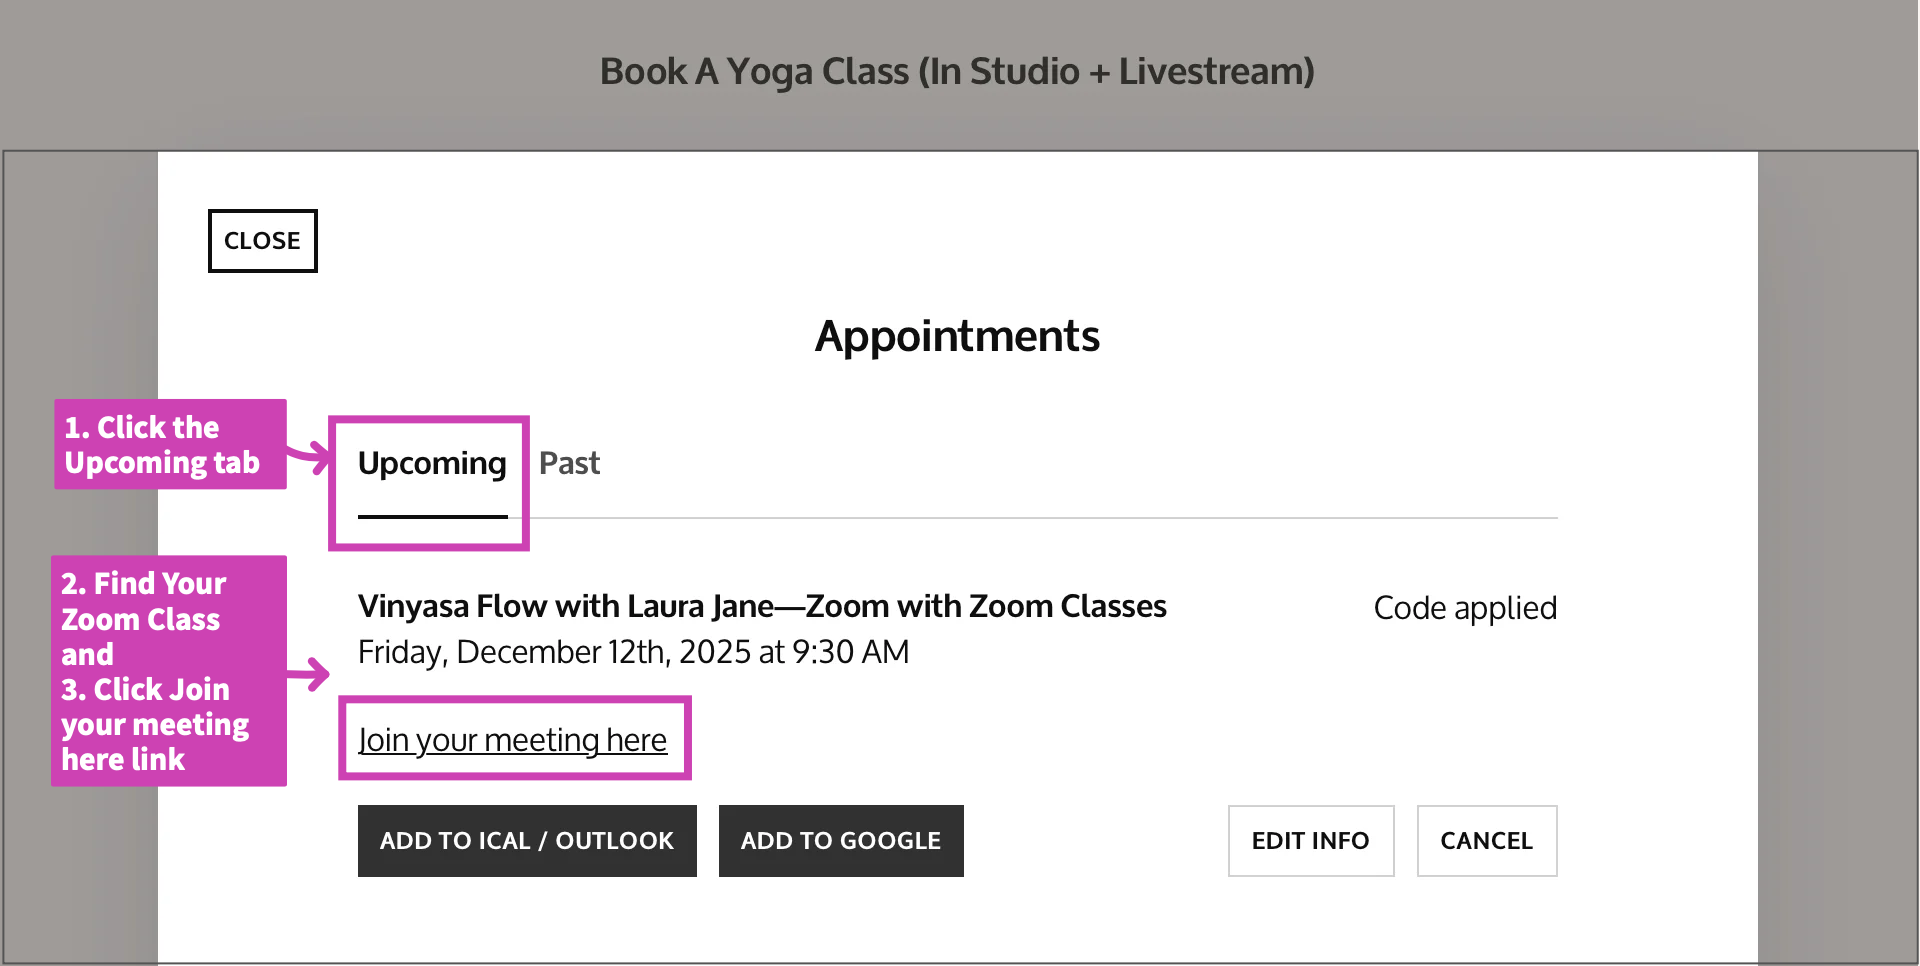
- Inside your Yoga Among Friends online account under Studio + Online Classes → Login → Appointments → Upcoming
To find your Zoom link inside your Yoga Among Friends online account, you must have created an account and logged in before registering for class.
If you register as a guest, you can still attend class. Please use the Zoom link provided in your confirmation email or reminder emails.
Need a bit of help?
If you have questions or need help registering, please contact us.